

![]()
Crisp Live Chat - Product Overview
Simple and Configurable Crisp Live Chat Integration for Blesta
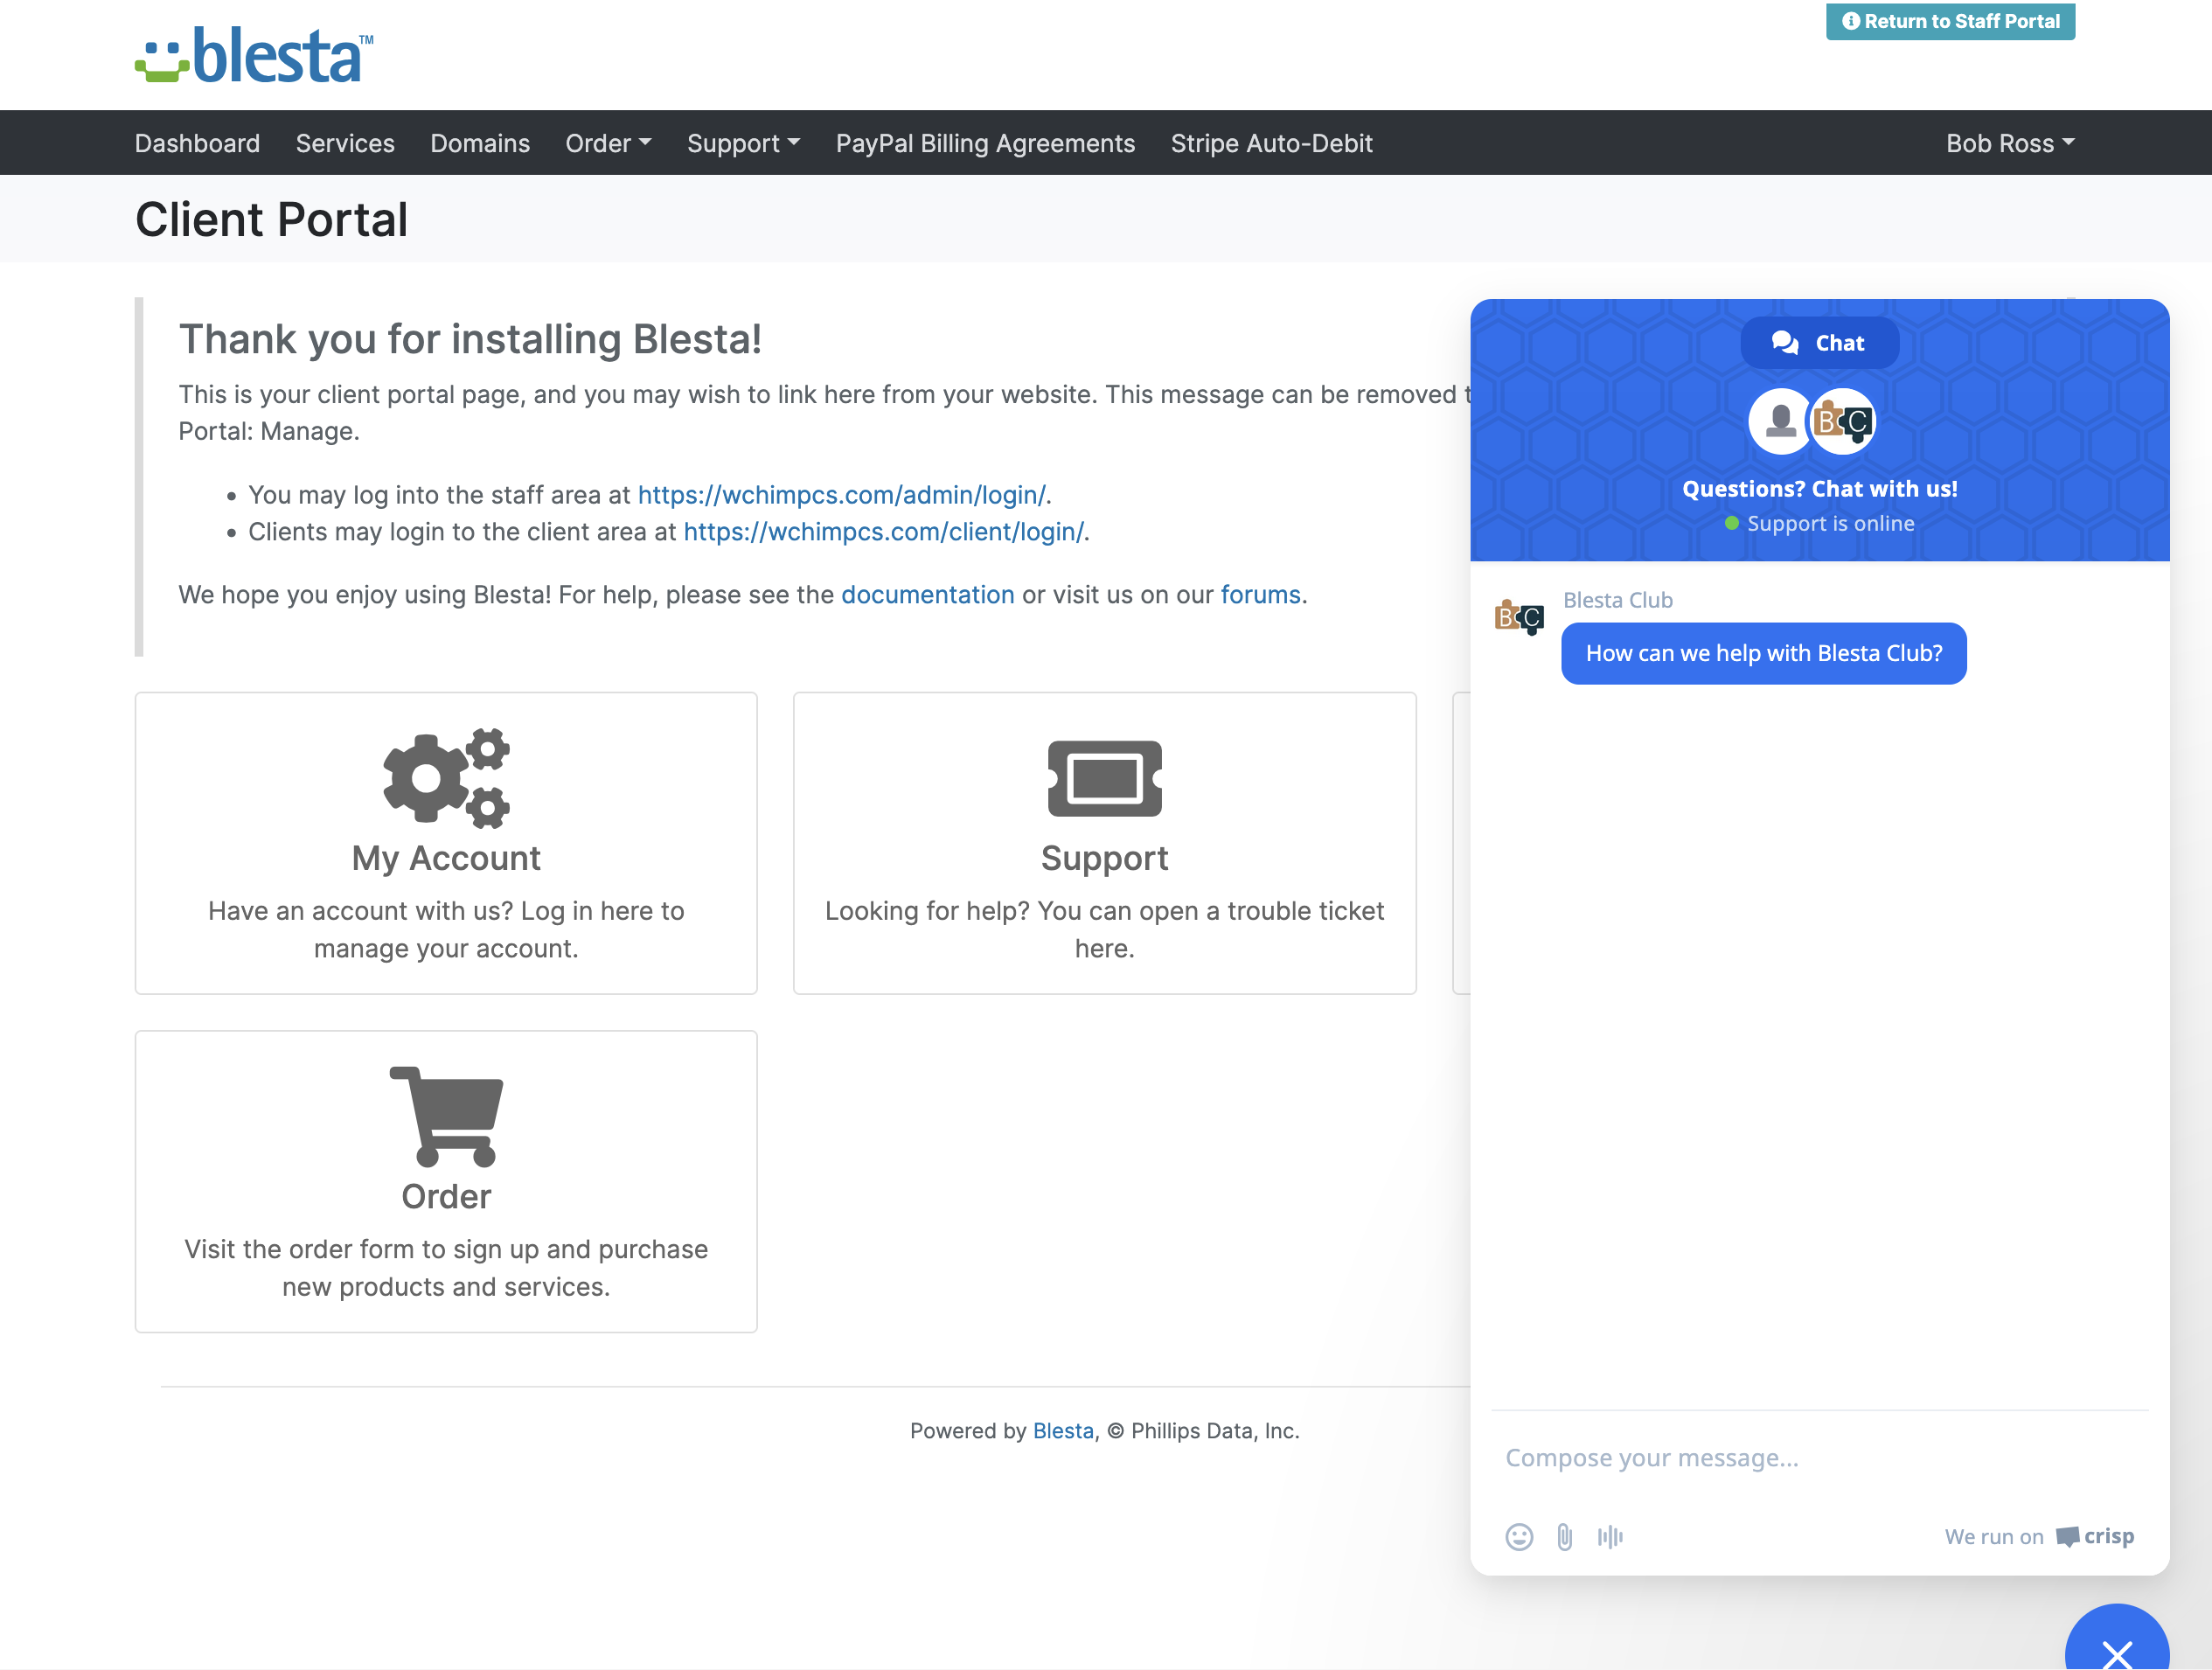
The Crisp Live Chat plugin for Blesta provides a simple and straightforward integration of Crisp Live Chat, allowing you to manage live chat support on your client-side interface. This powerful tool offers seamless integration with your Blesta installation, ensuring efficient client communication that persists over updates and changes!
Key Features
- Easy Installation: Simple steps to upload and install the plugin files.
- Seamless Integration: Integrates smoothly with your Blesta installation.
- Live Chat Support: Provides real-time support to your clients via Crisp Live Chat.
- User-Friendly Interface: Provides a straightforward and intuitive user experience to add your credentials.
Enhance your customer support capabilities with the Crisp Live Chat plugin by Blesta.Club.
Contact Us
If you encounter any issues or have suggestions for improving the plugin, please get in touch with us. We are committed to providing robust updates and welcome customer feedback.
![]()
Crisp Live Chat - Installation Guide
Welcome, and thank you for choosing the Crisp Live Chat plugin! We're delighted to have you as a customer and are committed to ensuring you have a seamless experience. This README aims to guide you through the installation of your new plugin. If you're new to Blesta or encounter any issues, please don't hesitate to reach out for support.
Installation Guide
Before proceeding, ensure you have the Blesta.club Subscription Manager installed if this item is leased. If you are using an owned source version, the Subscription Manager is not required.
Follow these steps to install the Crisp Live Chat plugin:
-
Download the Plugin Files:
- Download the Crisp Live Chat plugin files from the download section of thew client area.
-
Upload the Plugin Files:
- Upload the plugin files to a
/plugins/crisp/directory within your Blesta installation path. For example:/var/www/html/blesta/plugins/crisp/
- Upload the plugin files to a
-
Log in to Blesta Admin:
- Log in to your admin Blesta account.
-
Navigate to Plugins:
- Go to Settings > Plugins.
-
Install the Plugin:
- Find the Crisp plugin and click the "Install" button.
You're done with the installation! The only thing left is to configure it properly.
Contact Us
If you encounter any issues or have suggestions for improving the plugin, please get in touch with us. We are committed to providing robust updates and welcome customer feedback.
![]()
Crisp Live Chat - Update Guide
Keeping your Crisp Live Chat plugin up-to-date ensures you have the latest features and security improvements. Follow these steps to update your plugin:
Update Steps
-
Backup Existing Plugin Files:
- It's always a good practice to backup your existing plugin files before making any updates.
-
Download the Latest Version:
- Download the latest version of the Crisp Live Chat plugin files from the client area.
-
Upload New Plugin Files:
- Upload the new plugin files to your Blesta plugins directory, overwriting the existing files:
/var/www/html/blesta/plugins/crisp/
- Upload the new plugin files to your Blesta plugins directory, overwriting the existing files:
-
Log in to Blesta Admin:
- Log in to your Blesta admin account.
-
Navigate to Plugins:
- Go to Settings > Plugins.
-
Update the Plugin:
- Find the Crisp plugin and click the "Update" button.
No additional changes are needed outside of updating the files. Any breaking changes will be communicated to clients.
Keep your Crisp Live Chat plugin up-to-date to ensure you have the latest features and improvements.
Contact Us
If you encounter any issues or have suggestions for improving the plugin, please get in touch with us. We are committed to providing robust updates and welcome customer feedback.
![]()
Crisp Live Chat - Usage Guide
Once your Crisp Live Chat plugin is installed, you'll want to configure it to suit your needs. Follow the steps below for a comprehensive setup.
Setting Up the Plugin
-
Install the Plugin:
- Follow the installation guide to install the Crisp Live Chat plugin.
-
Configure the Plugin:
- Log in to your Blesta admin account.
- Navigate to Settings > Plugins.
- Find the Crisp Live Chat plugin in the list of installed plugins and click on the "Manage" button.
- Enter your Site ID to complete the configuration.
Quick Support: How to Set Up the Live Chat?
We assume you've already configured your Crisp account. To find your Site ID:
- Find Your Site ID:
- Log in to your Crisp account on app.crisp.chat.
- On the left, go to Settings > Website Settings and find your website.
- Click Settings on your website, then expand Setup instructions.
- In the expanded section, you'll see Website ID. Copy that and use it as your Site ID.
You're now done with the setup! Ensure your Blesta installation is properly configured to use the Crisp Live Chat plugin effectively.
Contact Us
If you encounter any issues or have suggestions for improving the plugin, please get in touch with us. We are committed to providing robust updates and welcome customer feedback.
--- v1.0.0 - 2024-09-22 ---
Blesta Club release
Pricing Options
Get exactly what you need and want.
Bundled
- +12 Other Extensions
- Additional Discounts
- Included Support & Updates
Leased
- Partially Encoded
- Full Functionality
- Included Support & Updates
Owned - Source
- Source Available
- Buy Once Use Forever
- 1 Year Support & Updates
Reviews
What our customers say
(0 customer reviews)
Seems like this extension doesn't have reviews yet...
Be one of the firsts to leave a review!
It is possible to leave a review only if you have purchased this extension or a bundle which contains it.
We reserve the right to alter wording or formatting for presentation.
We will discuss any changes made and offer the option to withdraw review text if the changes can't be agreed on.
It may take up to 1 hour for a review to appear or update due to caching.