
Stripe Payment Intents Gateway by Blesta.Club
Welcome, and thank you for choosing the Stripe Payment Intents Gateway! We're delighted to have you as a customer and are committed to ensuring you have a seamless experience. This guide aims to walk you through the general usage and capabilities of your gateway. If you're new to Blesta or encounter any issues, please don't hesitate to reach out for support.
Gateway Capabilities
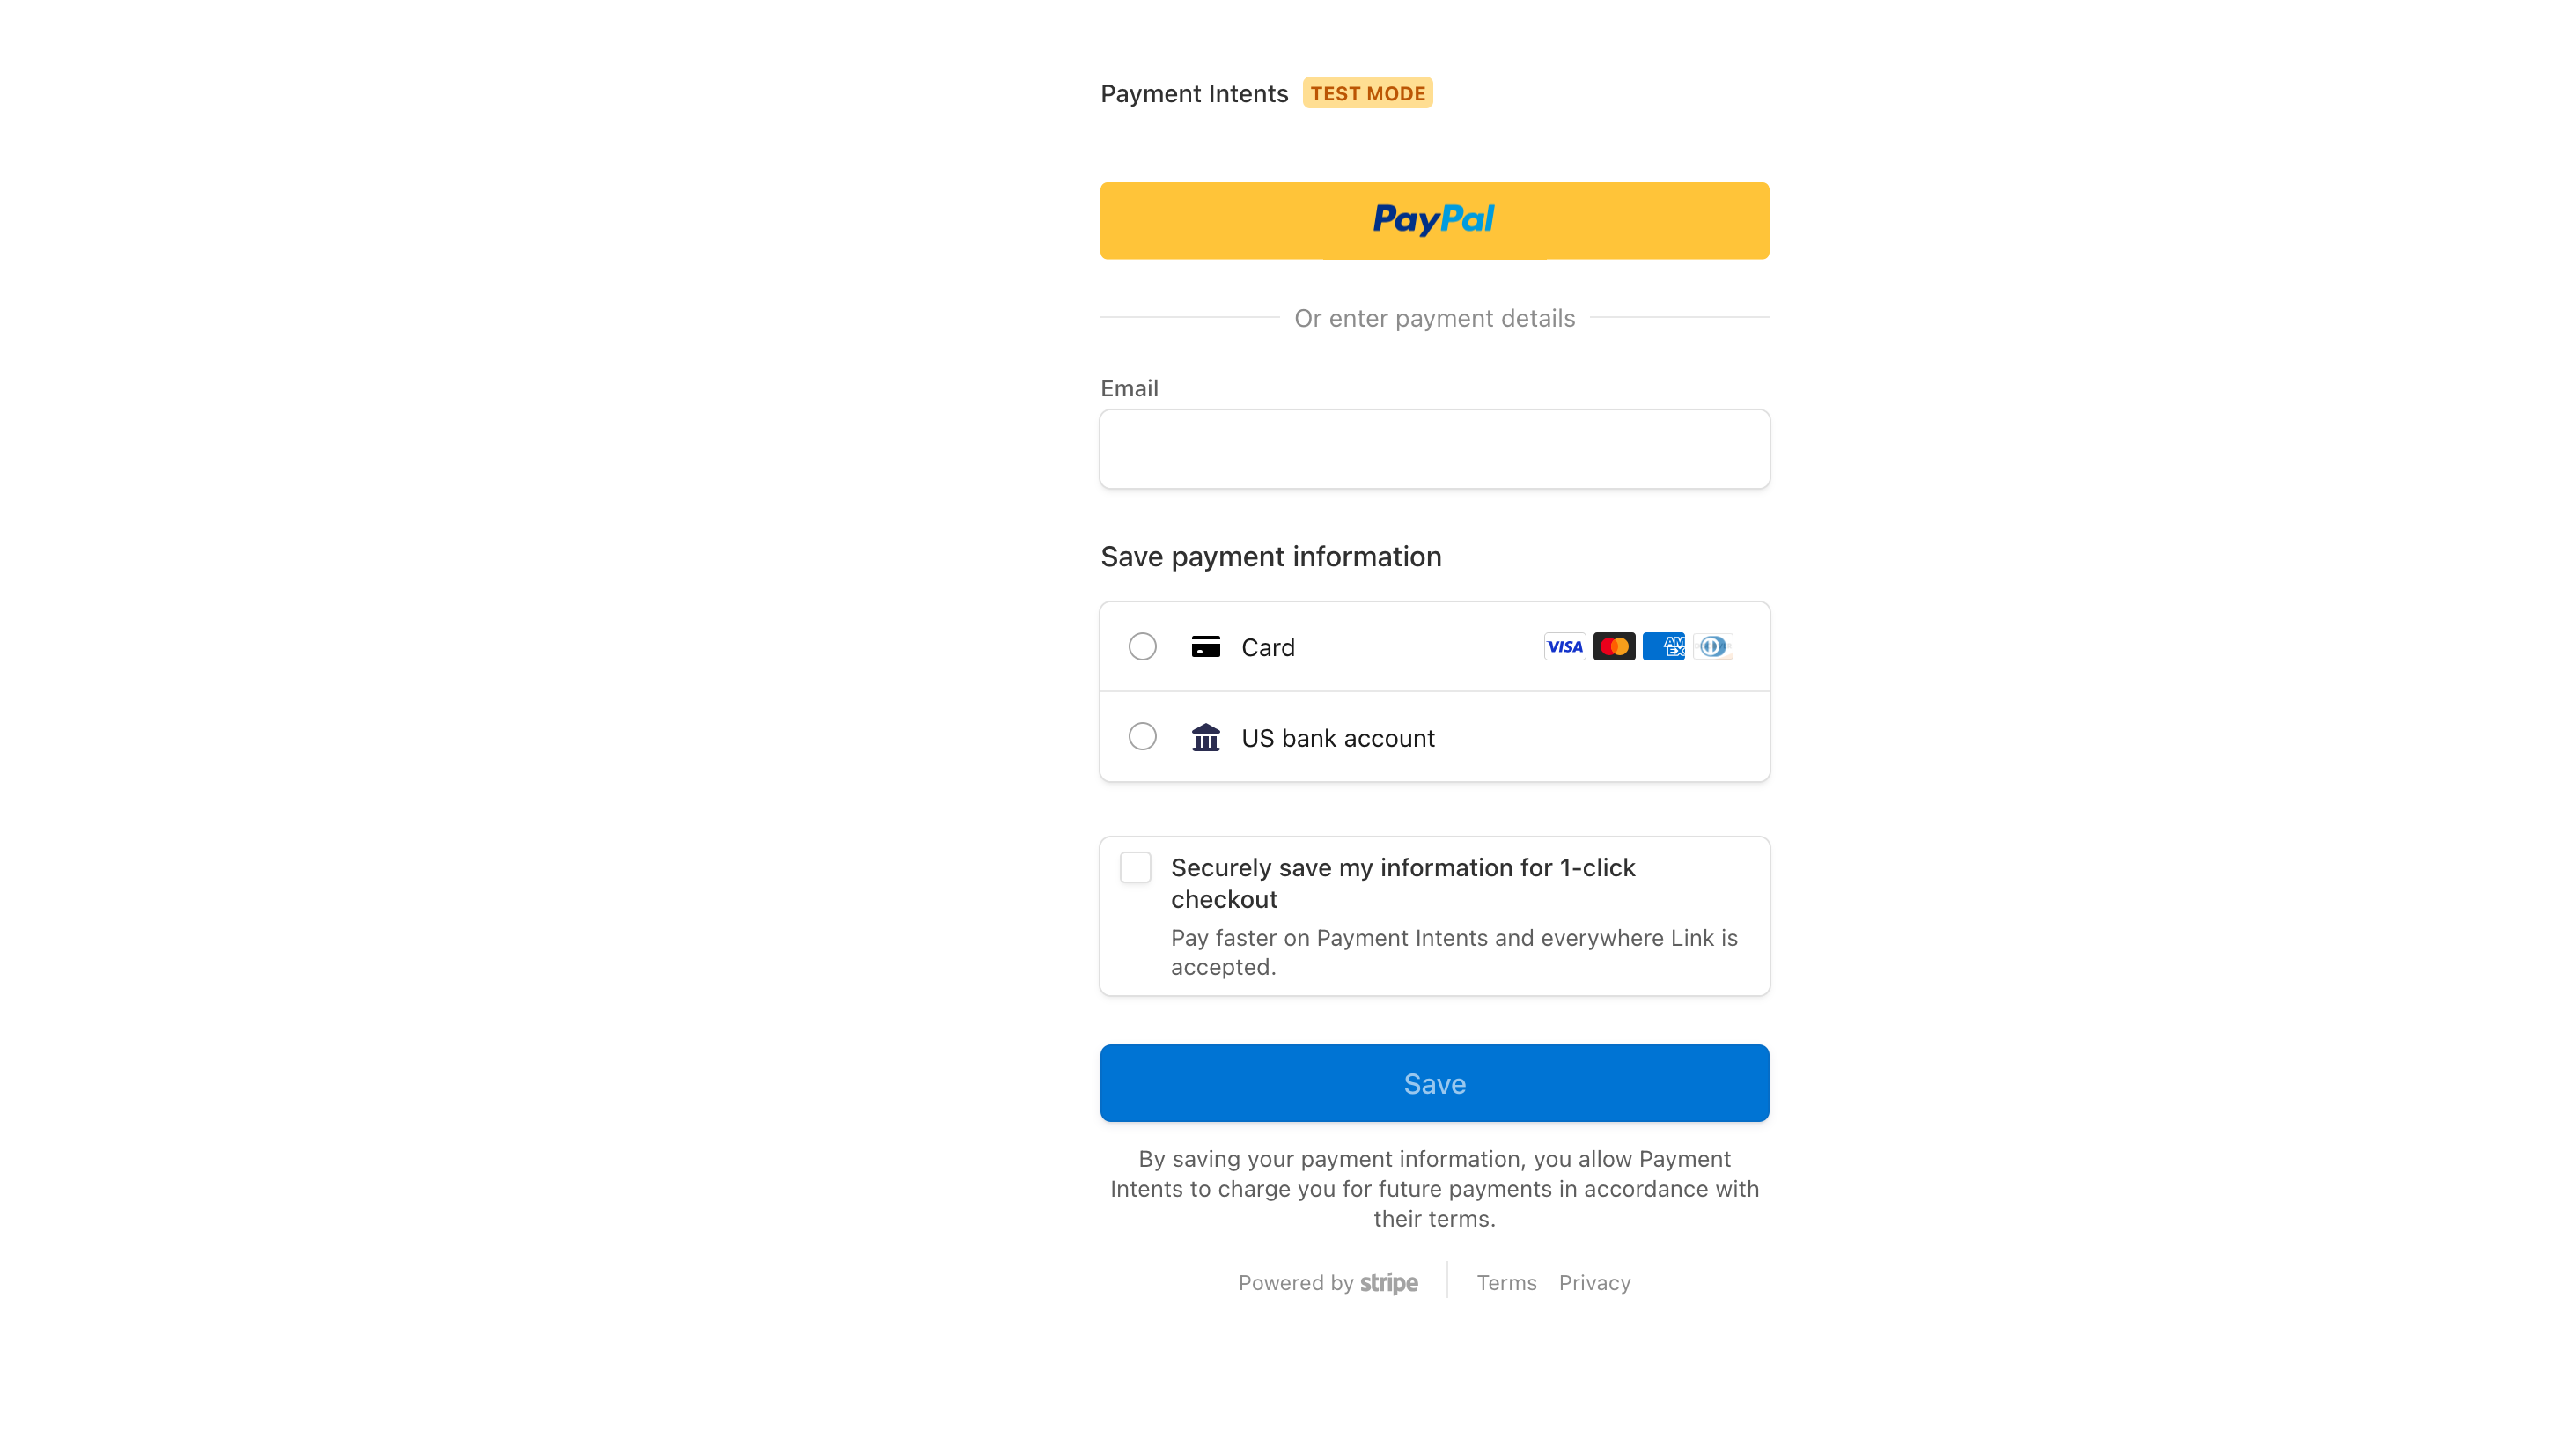
The Stripe Payment Intents Gateway is designed to process payments within Blesta, offering a seamless integration with your billing system. With support for on-demand billing as though it's a merchant gateway, it provides flexibility and convenience for both you and your clients With the added benefit of recurring or on-demand billing! This form of token based billing means you can bill on demand using the manager plugin whilst fully utilising Stripes different payment methods!
- Features
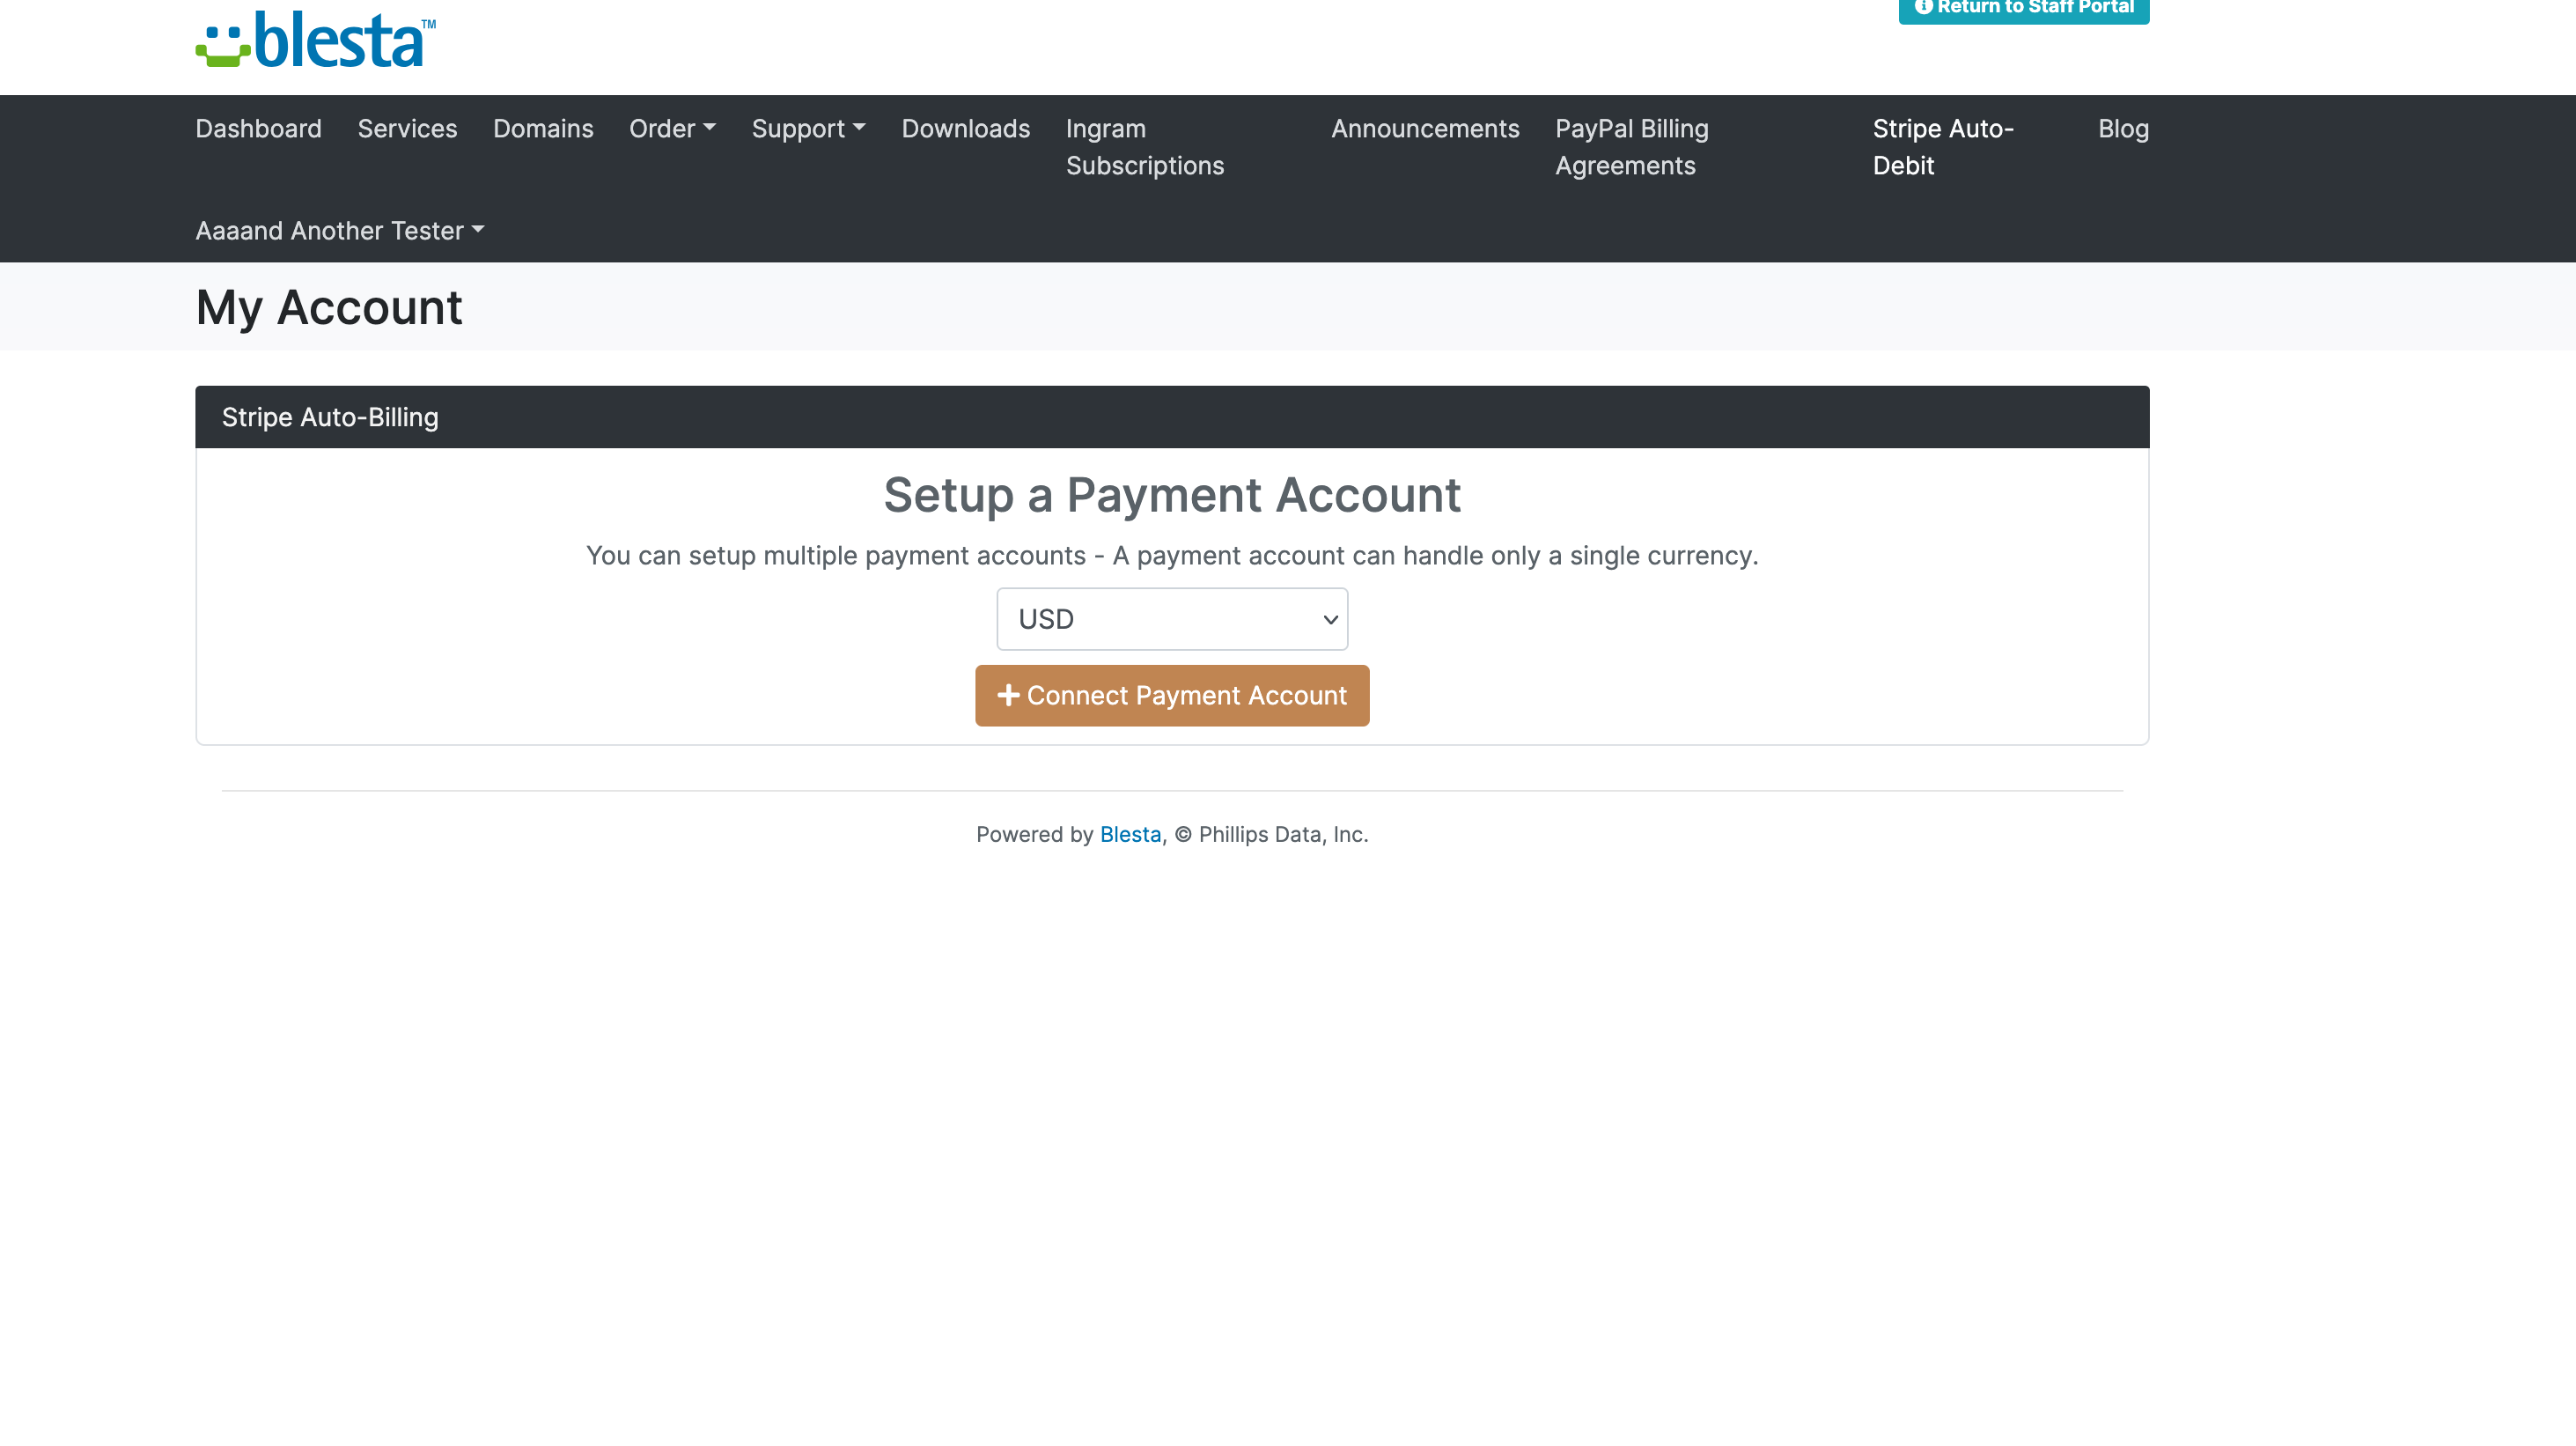
- Recurring Billing via stored tokens in the plugin provided with this gateway!
- Accept many of stripes methods for multiple countries around the world!
- Ability to bill on demand without creating a new payment profile each time.
Things to Note
-
Currency Support: Stripe supports multiple currencies; make sure to configure your currency settings within Blesta accordingly.
"currencies": ["USD","AED","AFN","ALL","AMD","ANG","AOA","ARS","AUD","AWG","AZN","BAM","BBD","BDT","BGN","BIF","BMD","BND","BOB","BRL","BSD","BWP","BYN","BZD","CAD","CDF","CHF","CLP","CNY","COP","CRC","CVE","CZK","DJF","DKK","DOP","DZD","EGP","ETB","EUR","FJD","FKP","GBP","GEL","GIP","GMD","GNF","GTQ","GYD","HKD","HNL","HRK","HTG","HUF","IDR","ILS","INR","ISK","JMD","JPY","KES","KGS","KHR","KMF","KRW","KYD","KZT","LAK","LBP","LKR","LRD","LSL","MAD","MDL","MGA","MKD","MMK","MNT","MOP","MRO","MUR","MVR","MWK","MXN","MYR","MZN","NAD","NGN","NIO","NOK","NPR","NZD","PAB","PEN","PGK","PHP","PKR","PLN","PYG","QAR","RON","RSD","RUB","RWF","SAR","SBD","SCR","SEK","SGD","SHP","SLL","SOS","SRD","STD","SZL","THB","TJS","TOP","TRY","TTD","TWD","TZS","UAH","UGX","UYU","UZS","VND","VUV","WST","XAF","XCD","XOF","XPF","YER","ZAR","ZMW","BIF","CLP","DJF","GNF","JPY","KMF","KRW","MGA","PYG","RWF","UGX","VND","VUV","XAF","XOF","XPF"] -
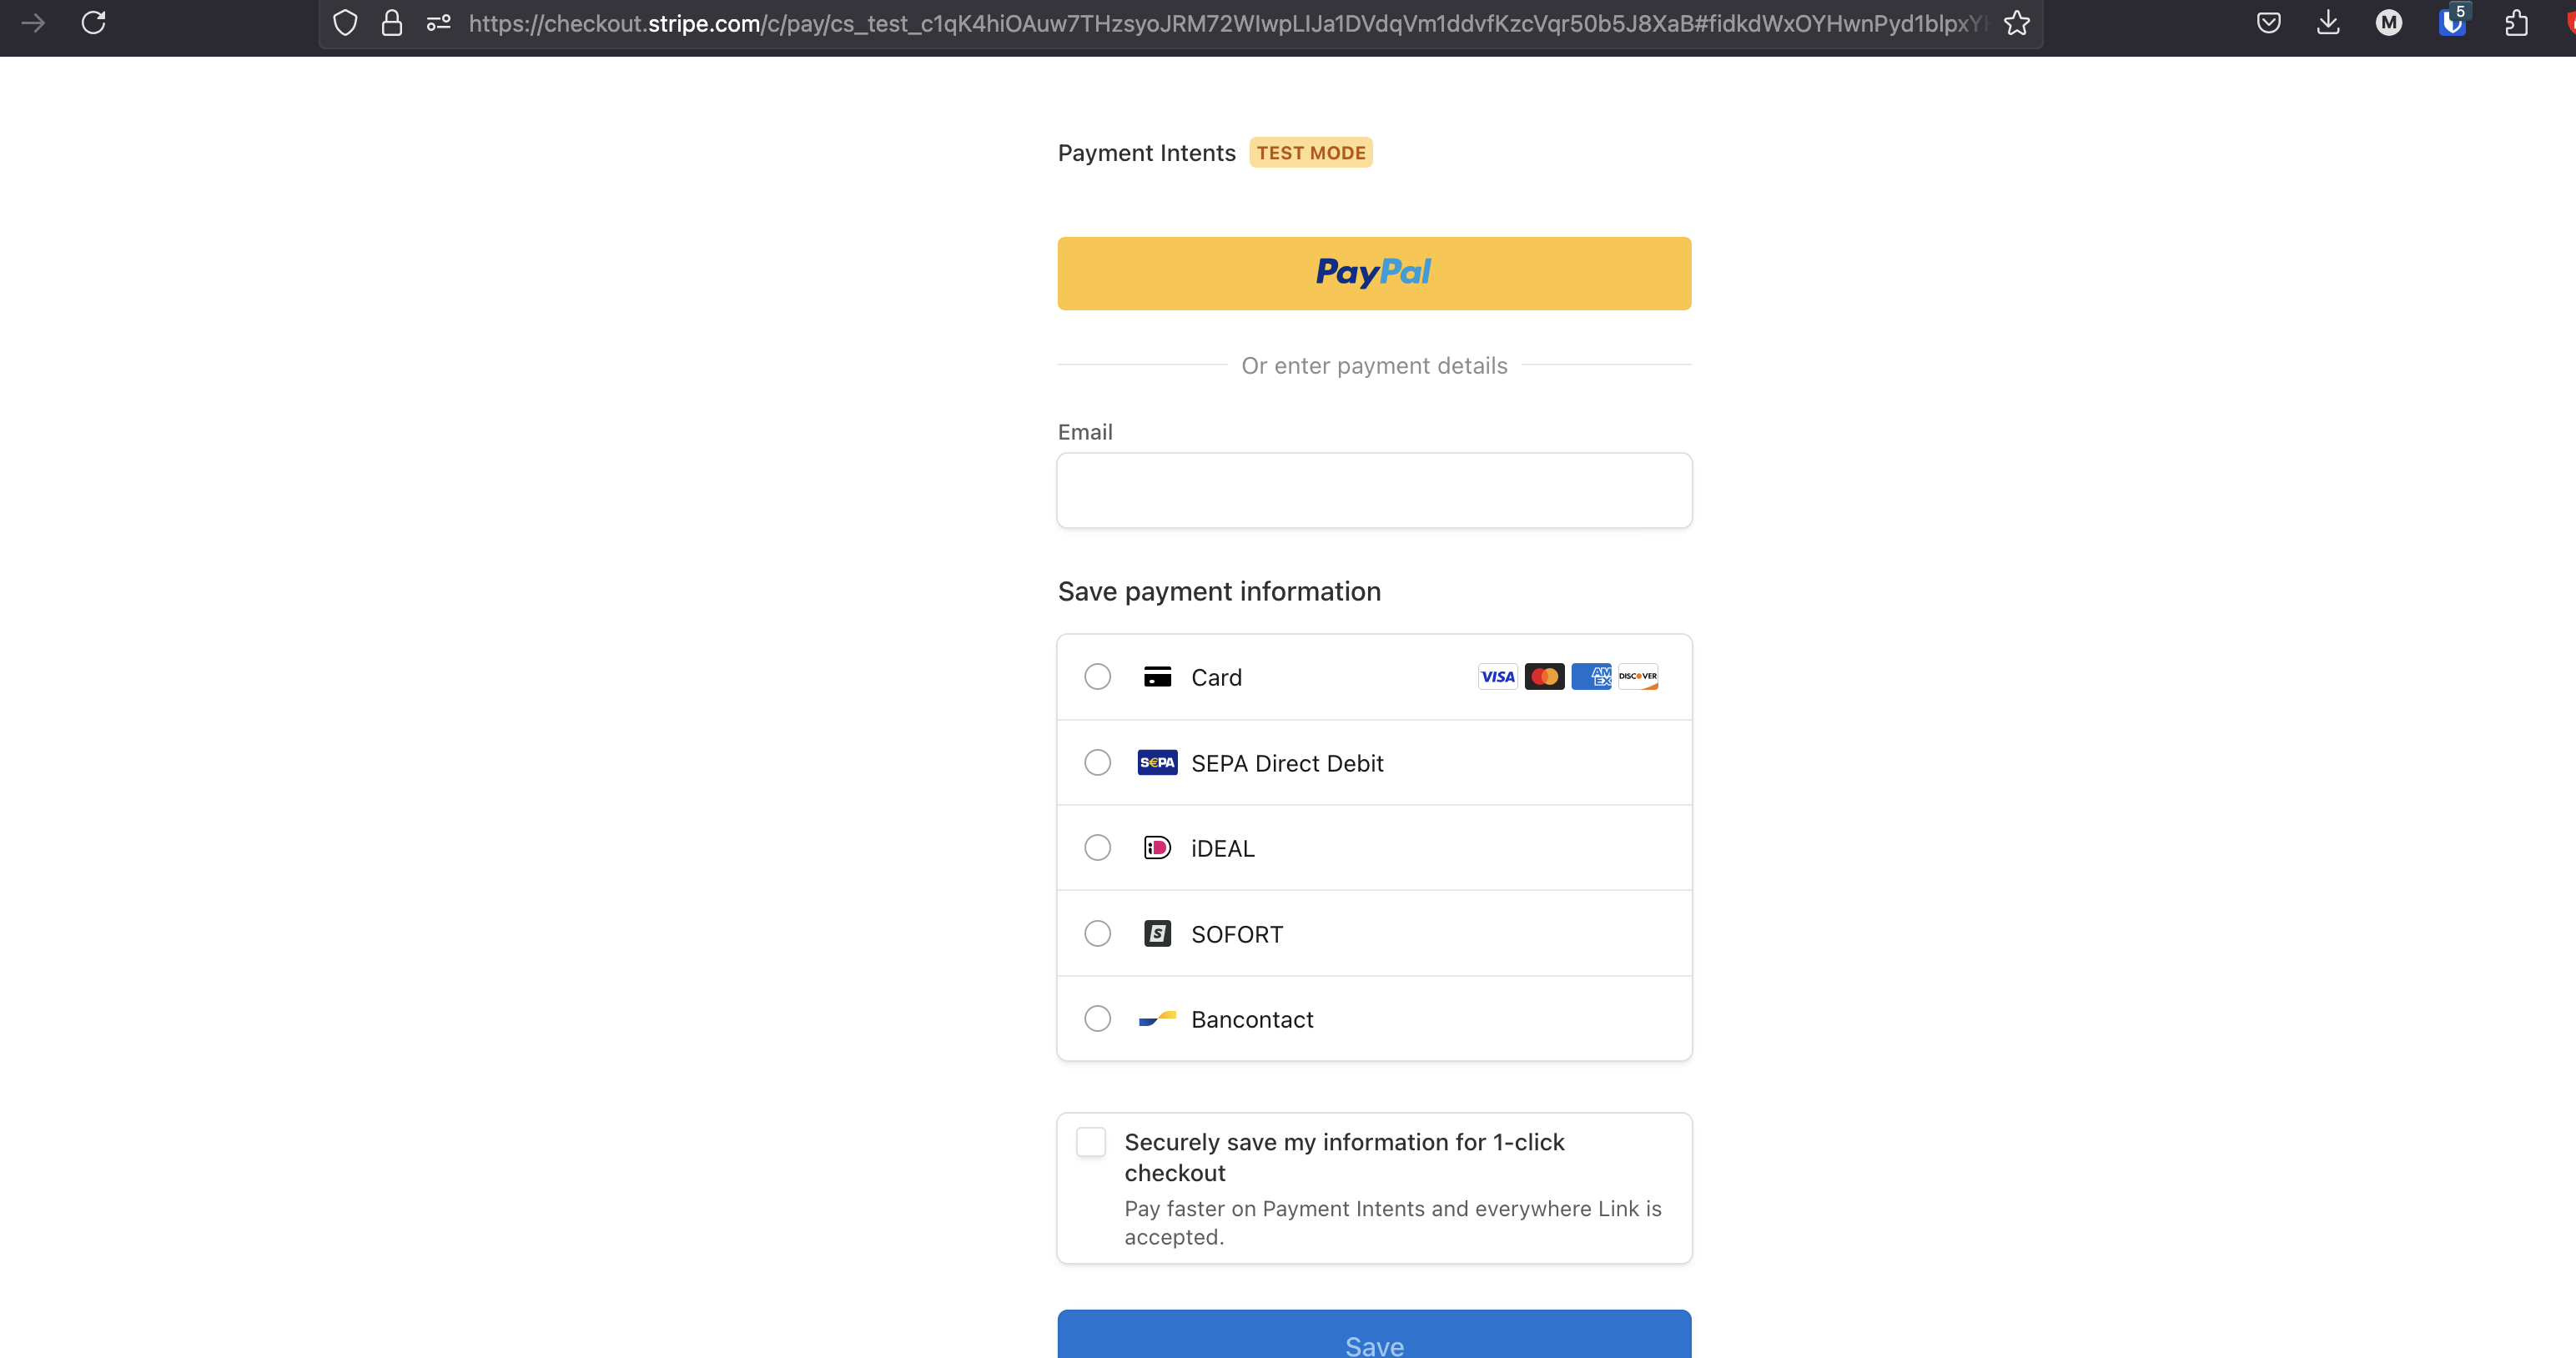
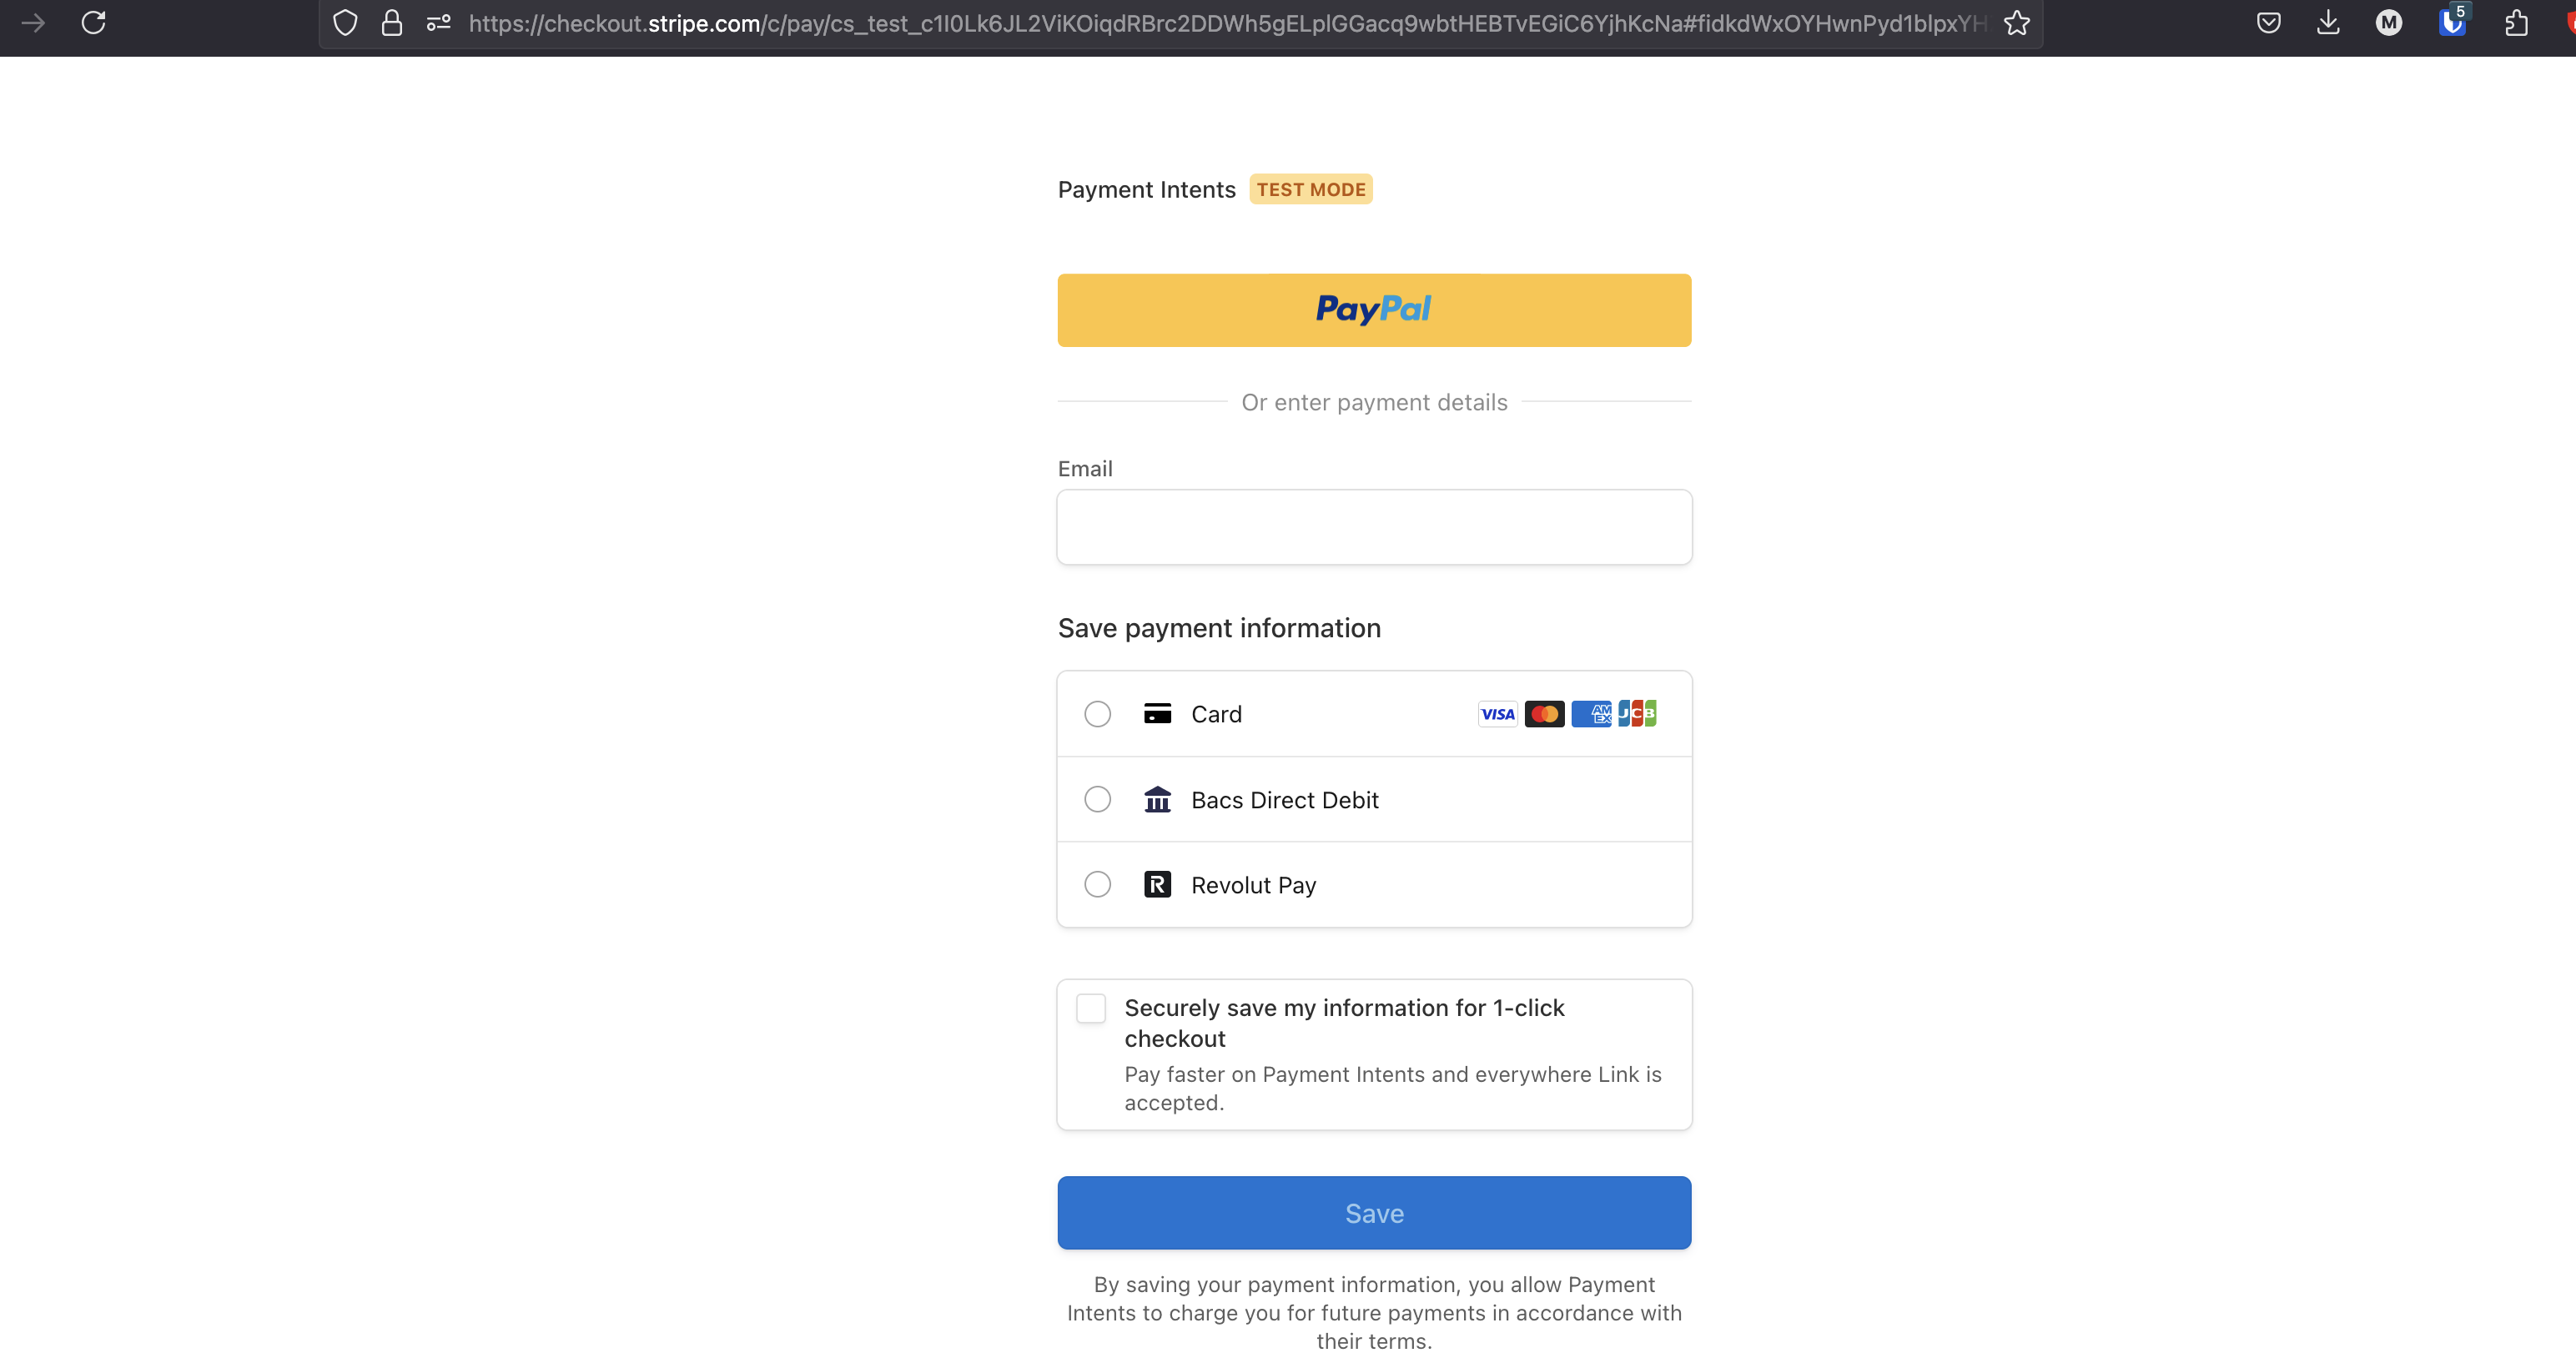
This gateway doesn't support the one time payments that Stripe Universal supports, so have a look through your Stripe (Settings - Payment methods) dashboard and check which ones are compatible. You can use both Stripe universal and Stripe Payment intents but please ensure you know which ones are compatible for your usecase.
-
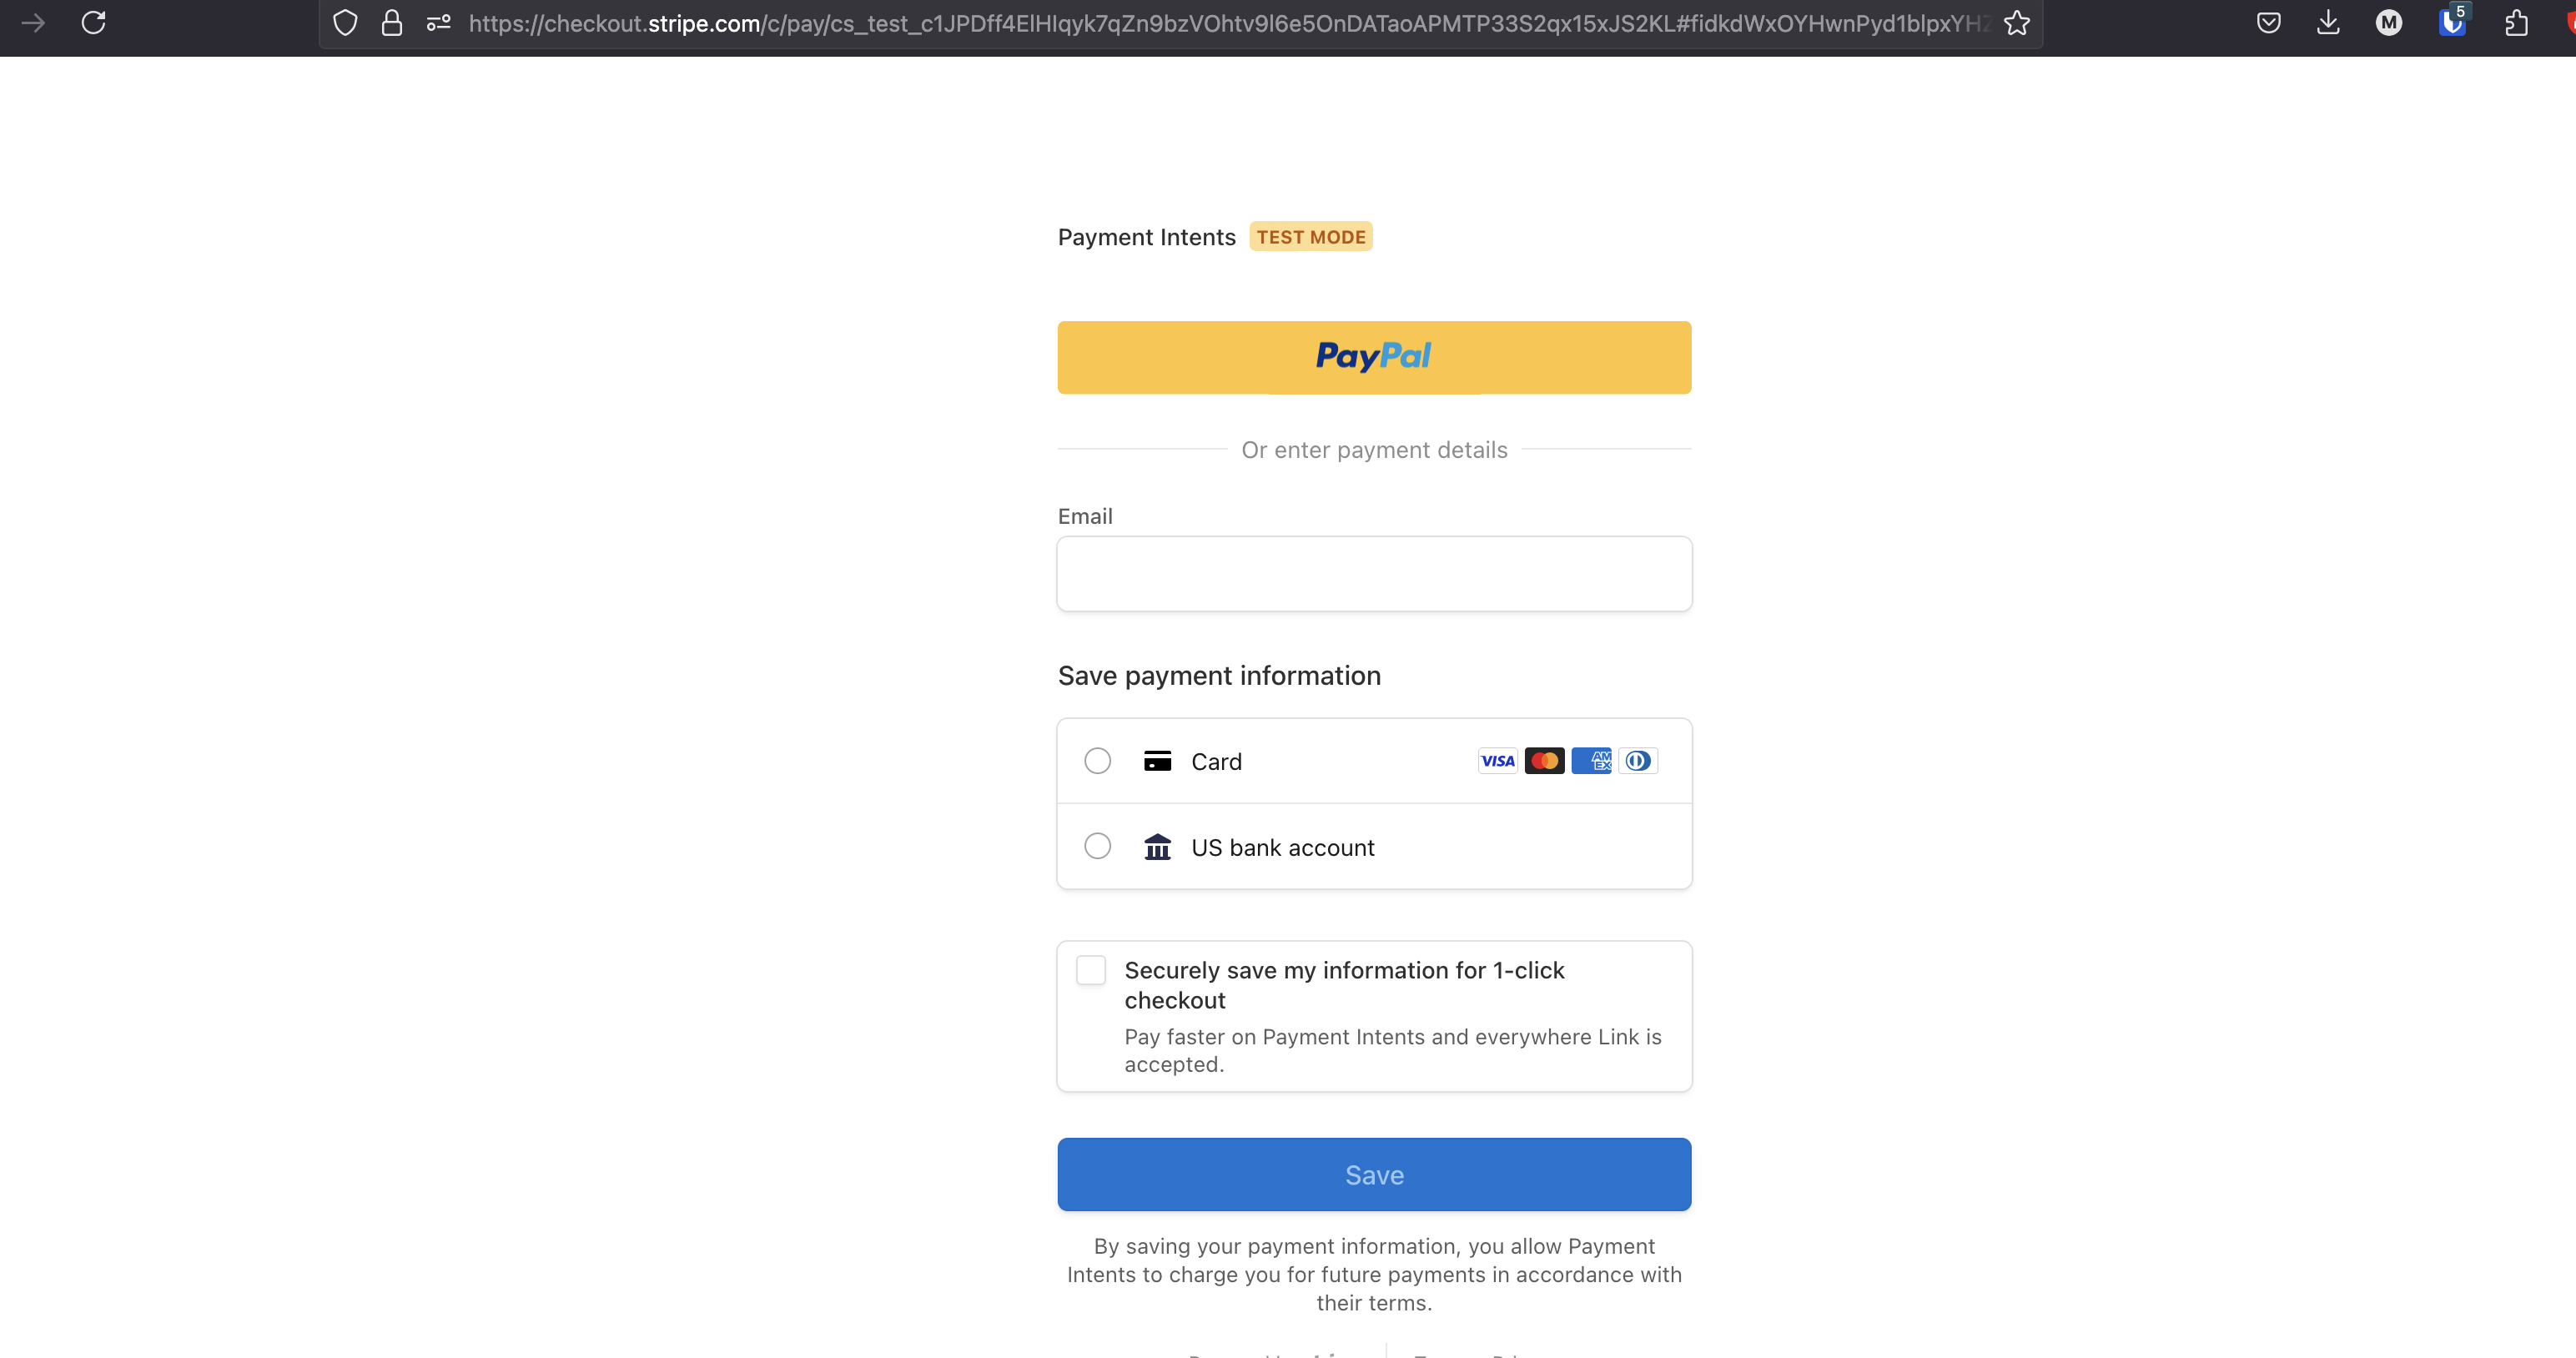
If you create a test transaction, You will see options for you rather than a hypotetical client. If you're based in the UK you will not see options for a client in the Netherlands. You can change the currency and use a VPN to simulate different options.
Setting Up the Gateway
Install the Gateway
-
Download the Gateway:
- Obtain the Stripe Payment Intents Gateway and Manager Plugin from the download section of my.blesta.club.
-
Upload to Blesta:
- Upload the Stripe Payment Intents Gateway to your Blesta gateways directory:
/var/www/html/blesta/components/gateways/nonmerchant/stripe_payment_intents_gateway/
- Upload the Stripe Payment Intents Gateway to your Blesta gateways directory:
-
Install the Gateway:
- Log in to your Blesta admin account and navigate to Settings > Payment Gateways.
- Find the Stripe Payment Intents Gateway and click the "Install" button.
Configure the Gateway
-
Manage the Gateway:
- Navigate to Settings > Payment Gateways (
/admin/settings/company/gateways/installed/). - Find the "Stripe Payment Intents" Gateway and click on "Manage".
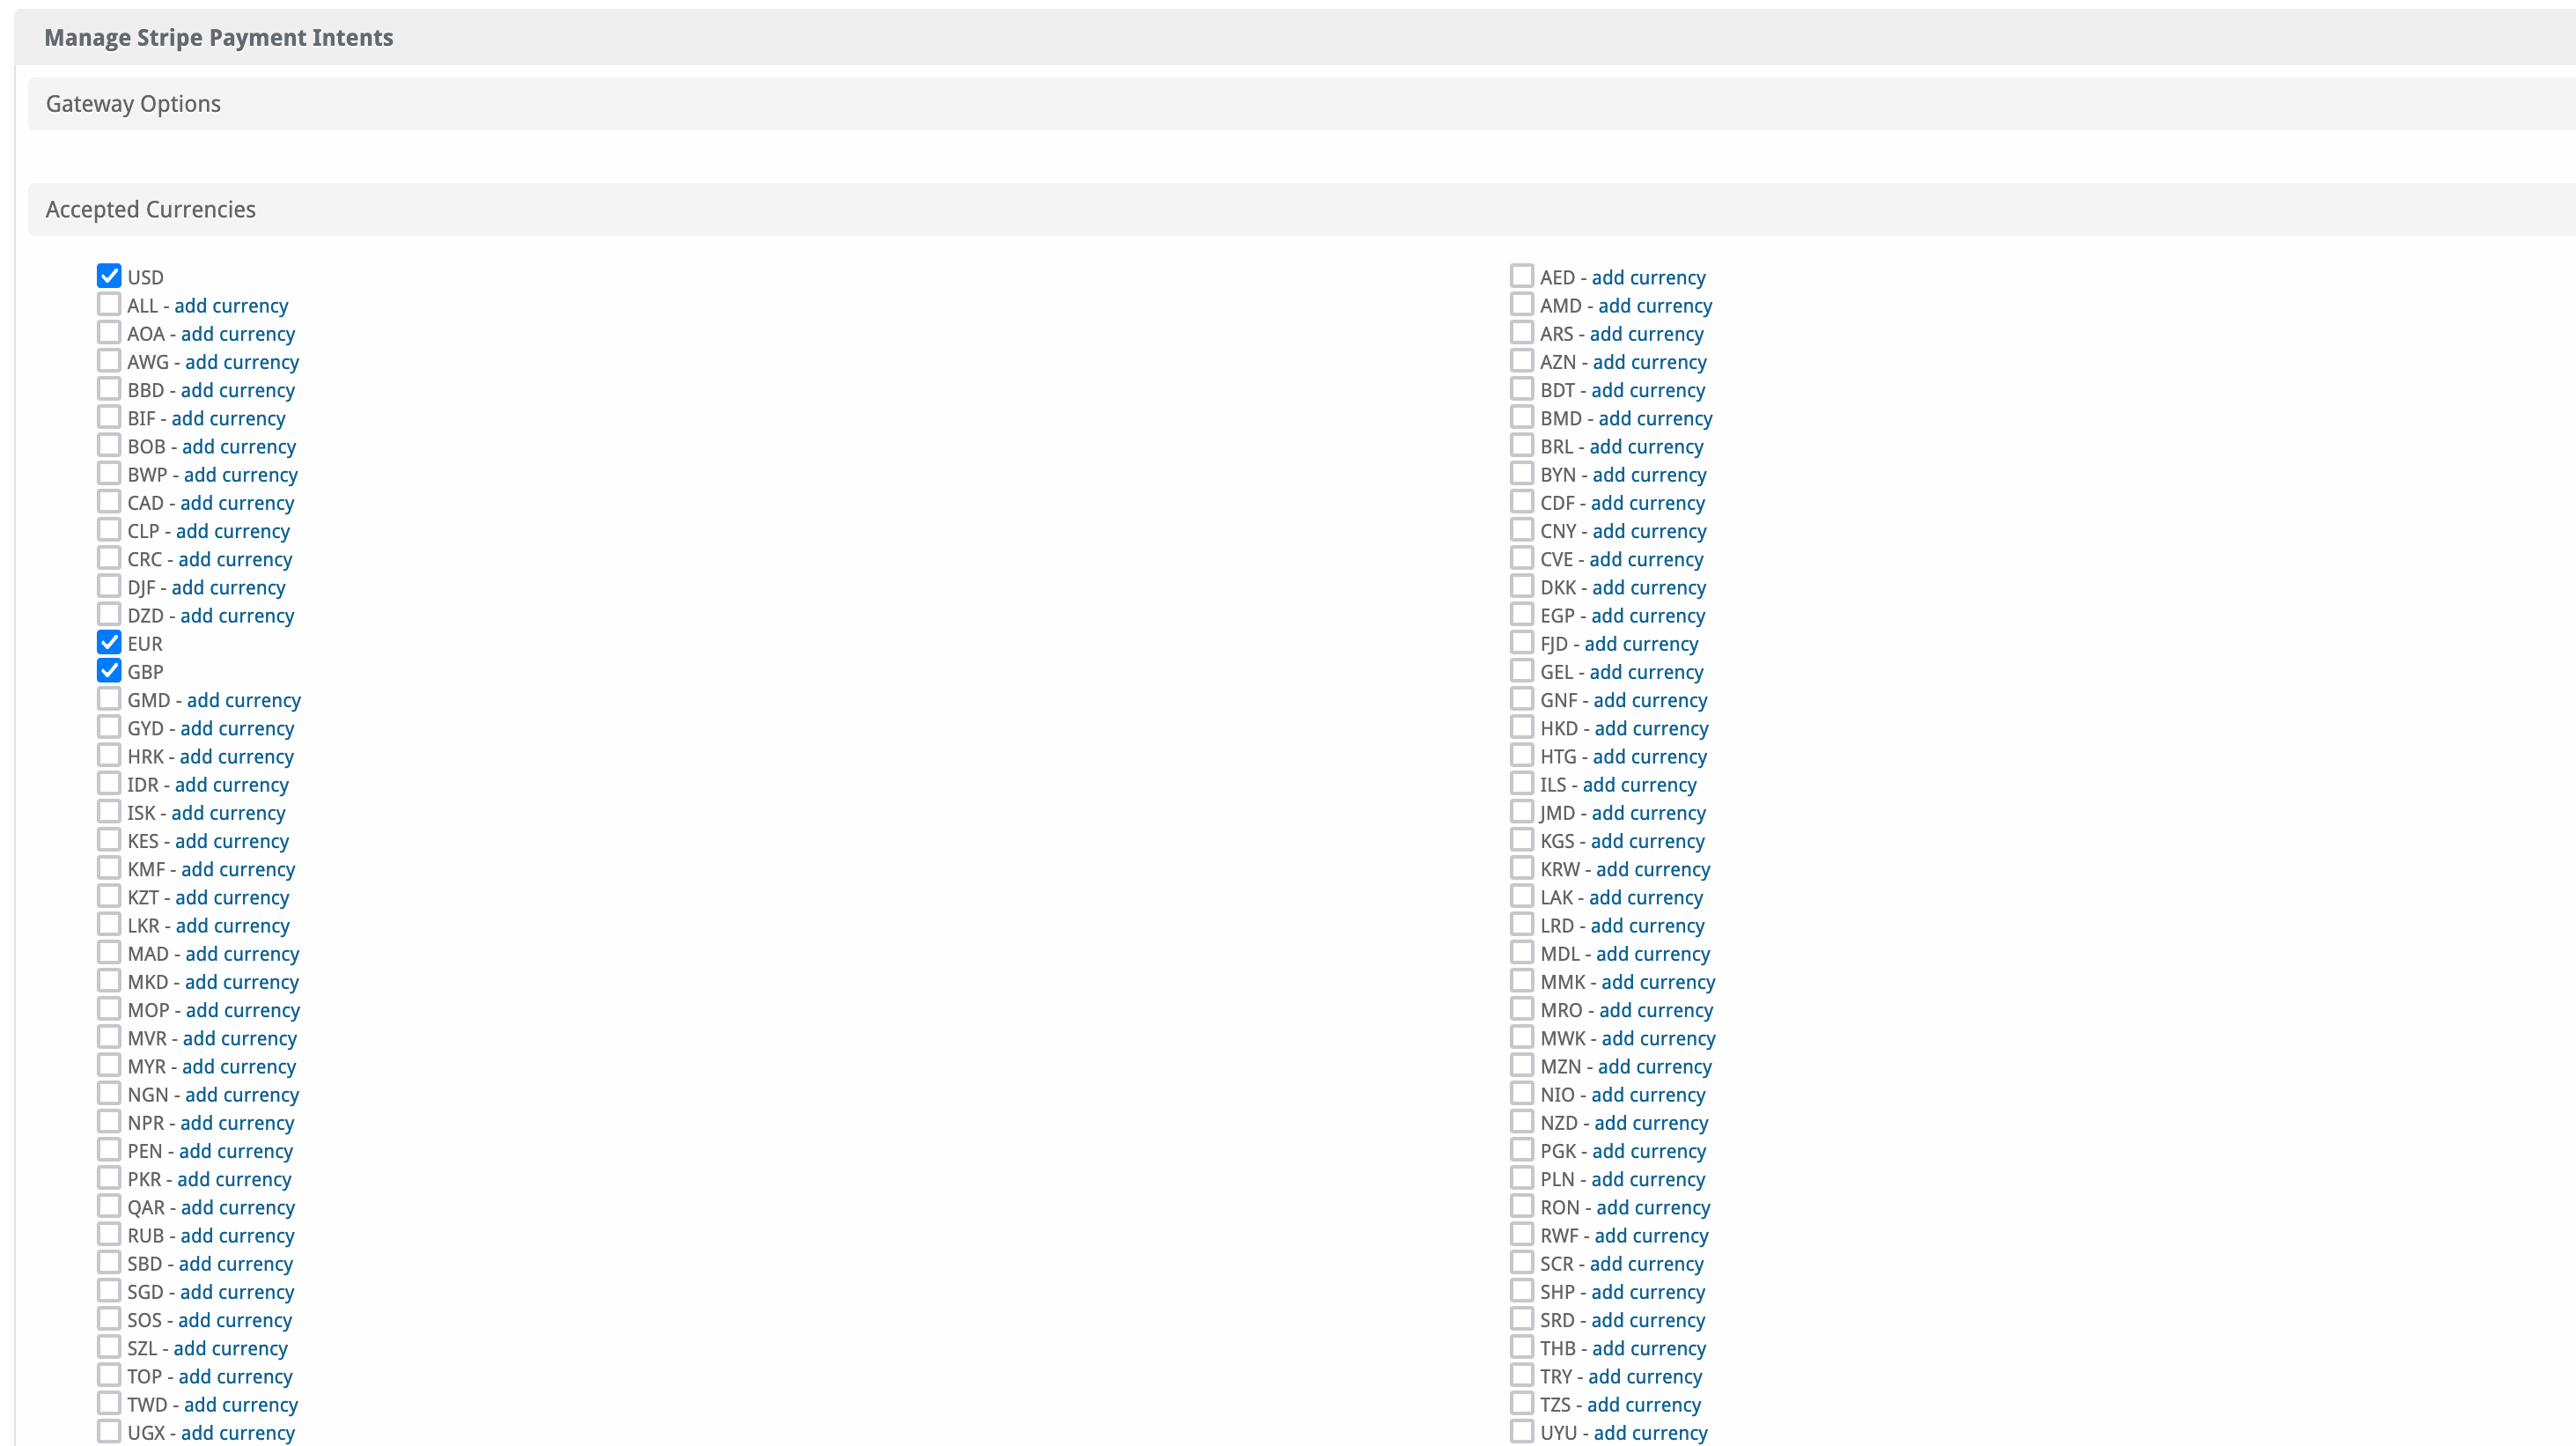
- Set your selected currencies required
- Navigate to Settings > Payment Gateways (
-
Enable Payment Processing:
- Ensure that the gateway is enabled for processing payments in your Blesta system. Configure any additional options, such as which order forms it should be on
-
Test the Gateway:
- It's recommended to perform a test transaction to ensure everything is working correctly. Use Stripe’s test mode for this purpose.
Quick Support
How to Obtain Stripe API Keys
-
Login to Stripe:
- Go to your Stripe Dashboard and log in with your credentials.
-
API Keys:
- Navigate to Developers > API Keys.
- Copy either the "Restricted or Secret Key" to be used in your Blesta gateway settings. These are both ok to use, Restricted is the new format by Stripe - You can choose to allow all the options or go through the permissions each of your choices will require and filter some out! This varies with each client so do a little research on your needs if you want to filter it down!
-
Configure API Keys in Blesta:
- Paste the API keys into the gateway settings in Blesta and save your changes.
Missing Payment Methods
-
Login to Stripe:
- Go to your Stripe Dashboard and log in with your credentials.
-
Turn on your payment method:
- Navigate to https://dashboard.stripe.com/settings/payment_methods/.
- Find your payment method.
- Press "Turn On".
- Is the method still not showing? Check 3.
-
Click on your payment method:
- Check the following:
- Does the method support "Recurring payments"? If not, it is not supported by Stripe Payment Intents. Use Stripe Universal instead.
- Are you using the "Supported currencies" of the payment method? If not, change the currency used.
- Check the following:
Troubleshooting Common Issues
-
Transaction Failures:
- Check that your API keys are correct and that your Stripe account is not in test mode when trying to process live transactions.
-
Currency Mismatch:
- Ensure that the currency configured in Blesta matches the currency settings in your Stripe account to avoid confusion over where it loads.
Contact Us
If you encounter any issues or have suggestions for improving the gateway, please get in touch with us. We are committed to providing robust updates and welcome customer feedback.
![]()
Stripe Payment intents Gateway by Blesta.Club - Installation Guide
Welcome, and thank you for purchasing the Stripe Payment intents Gateway! We're delighted to have you as a customer and are committed to ensuring you have a seamless experience. This README aims to guide you through the installation of your new gateway. If you're new to Blesta or encounter any issues, please don't hesitate to reach out for support.
Installation Guide
For detailed instructions on how to install the Stripe Payment intents Gateway, please ensure you have the license manager installed for leased extensions and then follow these steps:
-
Obtain the Gateway:
- Download the Stripe Payment intents Gateway and the Stripe Payment intents Manager Plugin from the download section of the client area.
-
Upload to Blesta:
- Upload the Stripe Payment intents Gateway to your Blesta gateways directory:
/var/www/html/blesta/components/gateways/nonmerchant/stripe_payment_intents_gateway/
- Upload the Stripe Payment intents Gateway to your Blesta gateways directory:
-
Install the Gateway:
- Log in to your Blesta admin account.
- Navigate to Settings > Payment Gateways.
- Find the Stripe Universal Gateway under the "Available" tab and click the "Install" button.
Setting Up the Gateway
-
Configure the Gateway:
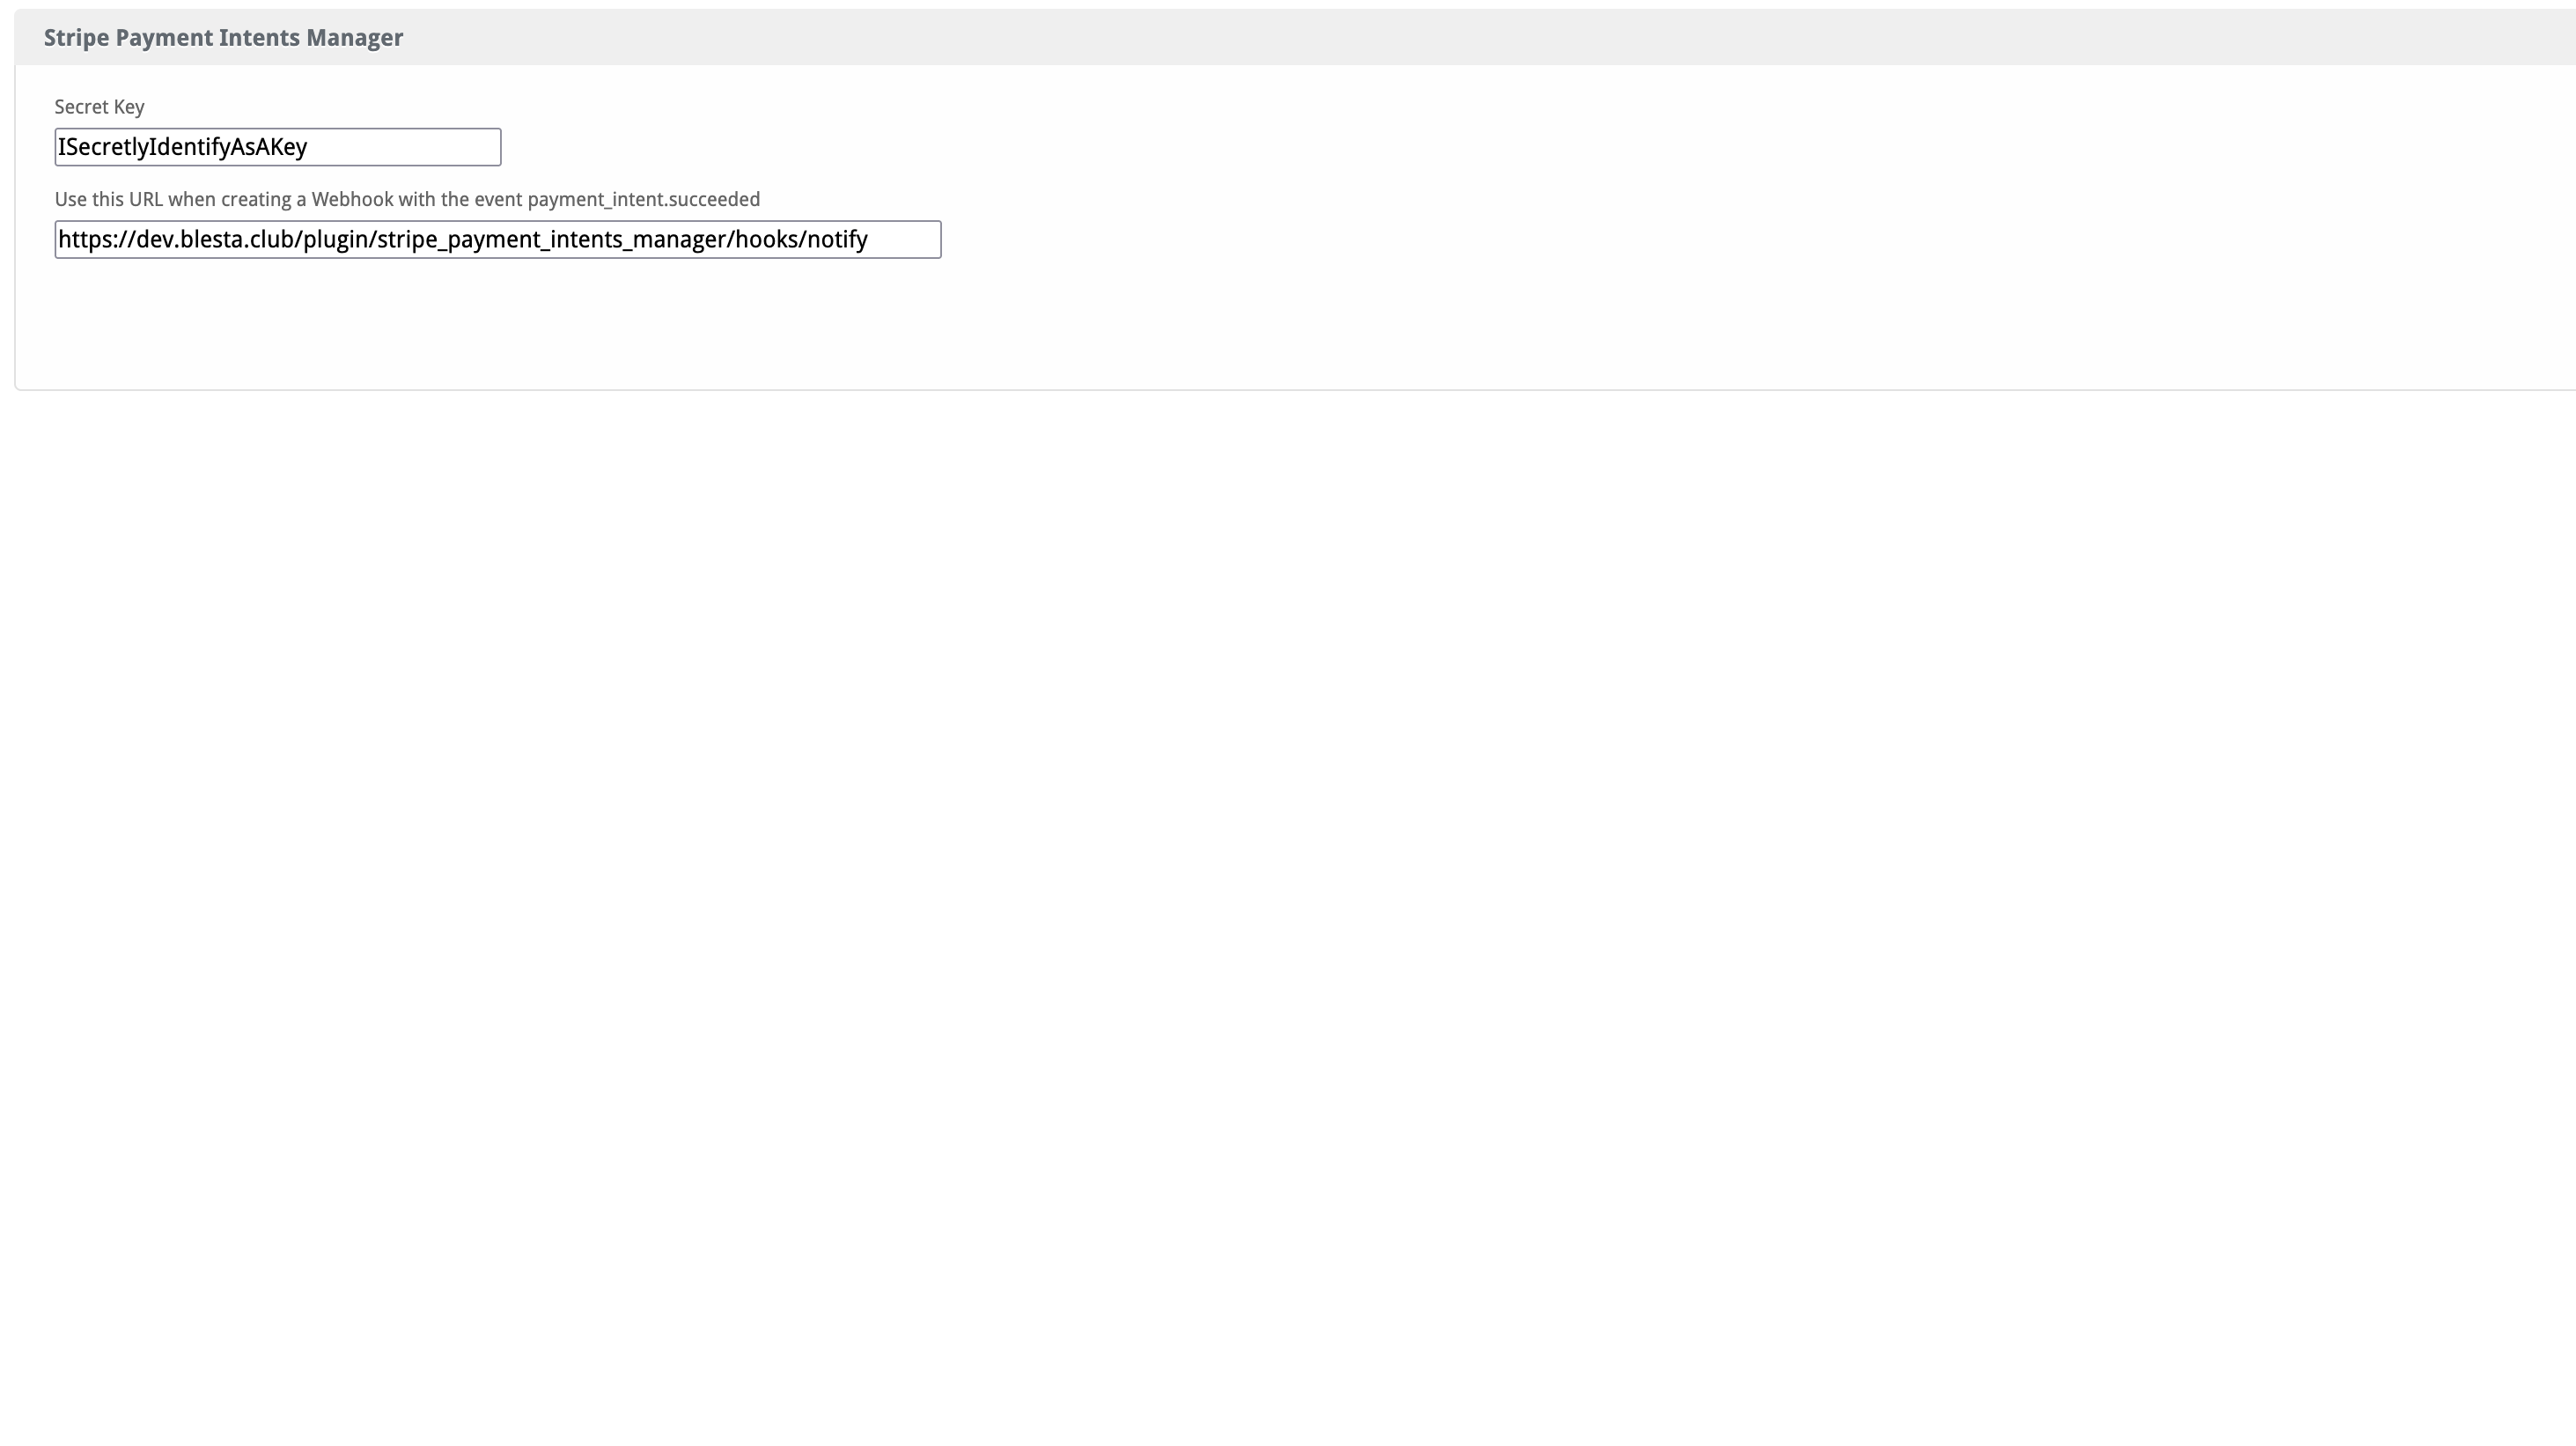
- Navigate to Settings > Plugins (
/admin/settings/company/plugins/installed/). - Find the "Stripe Payment intents" Plugin and click on "Manage".
- Input your Stripe API key and other necessary settings. Refer to the usage instructions if needed.
- Navigate to Settings > Plugins (
-
Ensure the Stripe Payment intents Manager plugin is also installed:
- This is available from the client area, Follow the guide included to install that before moving onto the usage guide!
Contact Us
If you encounter any issues or have suggestions for improving the gateway, please get in touch with us. We are committed to providing robust updates and welcome customer feedback.
![]()
Stripe Payment Intents Gateway by Blesta.Club - Update Guide
To ensure you are always using the latest version of the Stripe Payment Intents Gateway, follow these steps to update the gateway within your Blesta installation.
Steps for Updating the Gateway
1. Download the Latest Version
- Visit the download section of the client area to obtain the latest version of the Stripe Payment Intents Gateway.
2. Upload the Updated Gateway
- Upload the updated files to your Blesta installation directory, replacing the existing files.
- The directory path is:
/var/www/html/blesta/components/gateways/nonmerchant/stripe_payment_ntents/
3. Update the Gateway in Blesta
- Log in to your Blesta admin account.
- Navigate to Settings > Payment Gateways.
- Locate the Stripe Payment Intents Gateway in the list and click the "Upgrade" or "Update" button, if available.
Testing the Update
-
Test Mode:
- Before switching back to live transactions, you may want to test the gateway in Stripe's test mode to ensure everything works as expected.
-
Transaction Testing:
- Perform a test transaction using the updated gateway to ensure that payments are processed successfully.
Troubleshooting Update Issues
1. Missing or Incorrect Files:
- If you experience issues after updating, ensure all files have been uploaded correctly to the appropriate directory.
- Check file permissions to ensure the web server can access the updated files.
2. API Key Issues:
- If transactions are failing after the update, verify that the correct API keys are configured in the gateway settings. Ensure that you're using live API keys for real transactions and test keys for testing purposes.
Contact Us
If you encounter any issues during the update process or have suggestions for improving the gateway, please reach out to us. We are dedicated to providing consistent updates and value your feedback.
![]()
Stripe Payment Intents Gateway by Blesta.Club - Usage Guide
Welcome, and thank you for choosing the Stripe Payment Intents Gateway! We're delighted to have you as a customer and are committed to ensuring you have a seamless experience. This guide aims to walk you through the general usage and configuration of your gateway. If you're new to Blesta or encounter any issues, please don't hesitate to reach out for support.
Things to Note
-
Currency Support: Stripe supports multiple currencies; configure your currency settings in Blesta accordingly to avoid processing errors.
-
Make sure additional methods are enabled from https://dashboard.stripe.com/settings/payments before usage! Obviously they override the configuration in Blesta
-
sk or rk? Used interchangably - Don't panic if they're worded slightly different until sk is phased out by Stripe
Using the Gateway
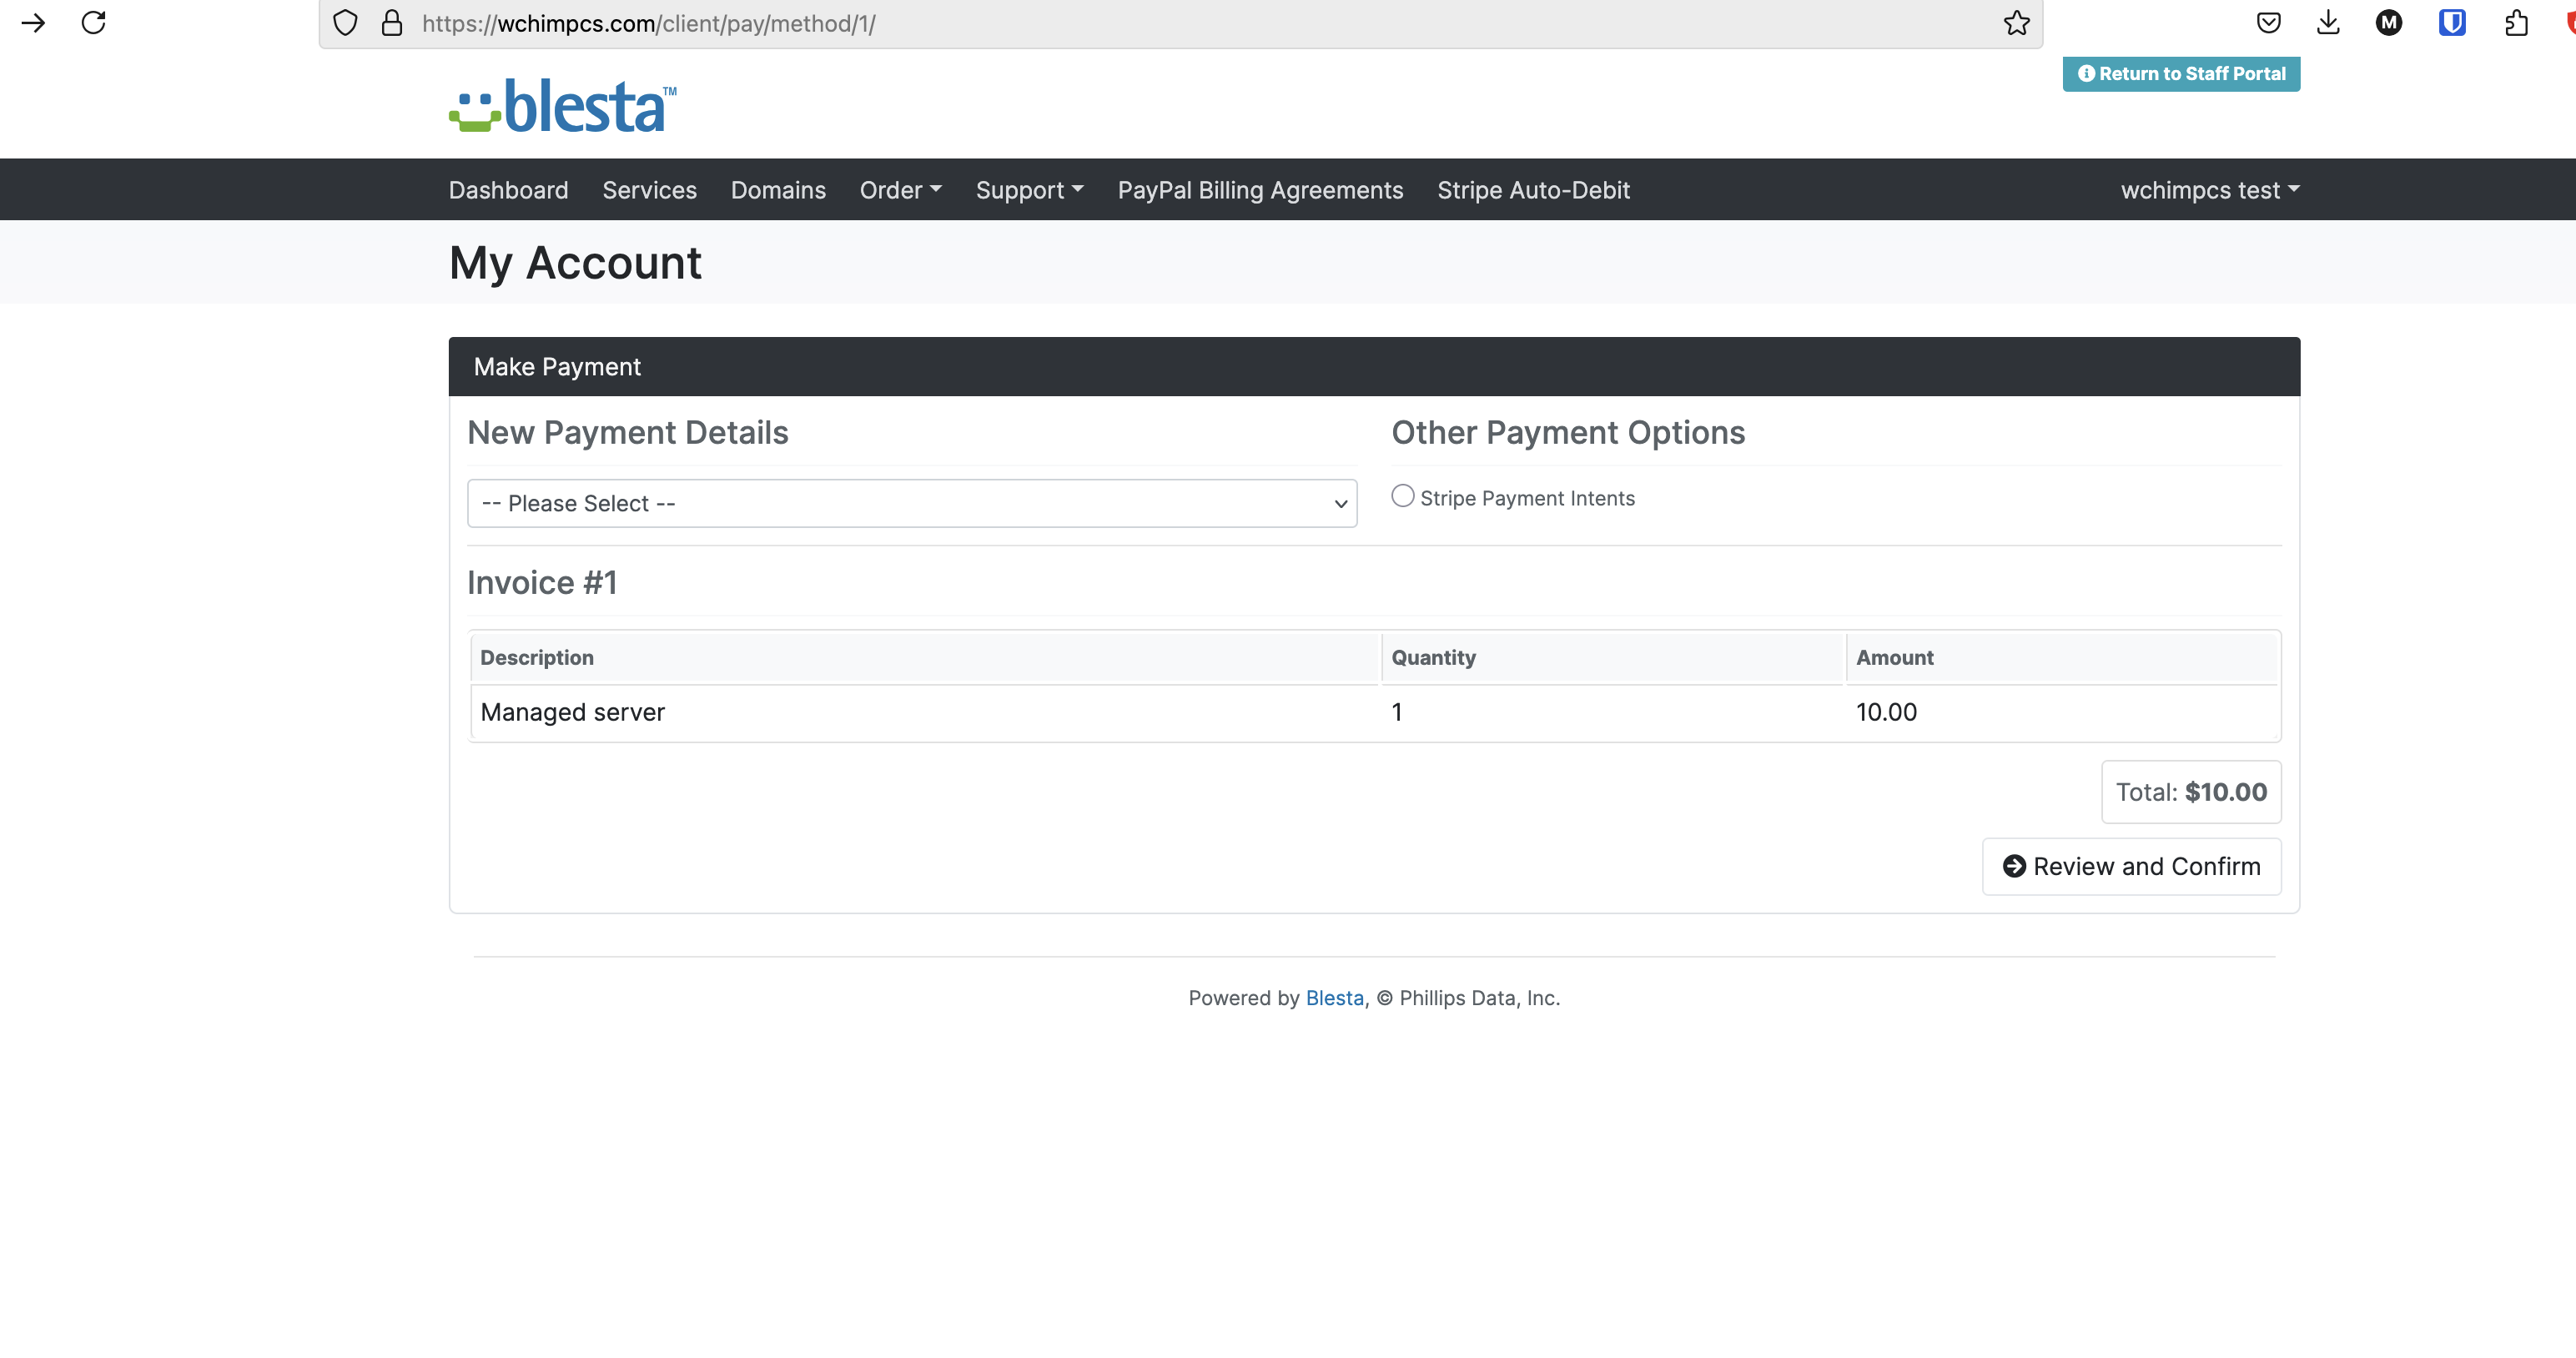
Once the Stripe Payment Intents Gateway is installed and configured, it will allow you to process payments for your Blesta billing system. Below are the general steps for managing the gateway:
Configure Payment Settings
-
Manage the Gateway:
- Navigate to Settings > Payment Gateways in your Blesta admin panel (
/admin/settings/company/gateways/installed/). - Select "Stripe Payment Intents" Gateway and click on "Manage".
- Configure the accepted currencies. Click "Update Settings" to save your changes.
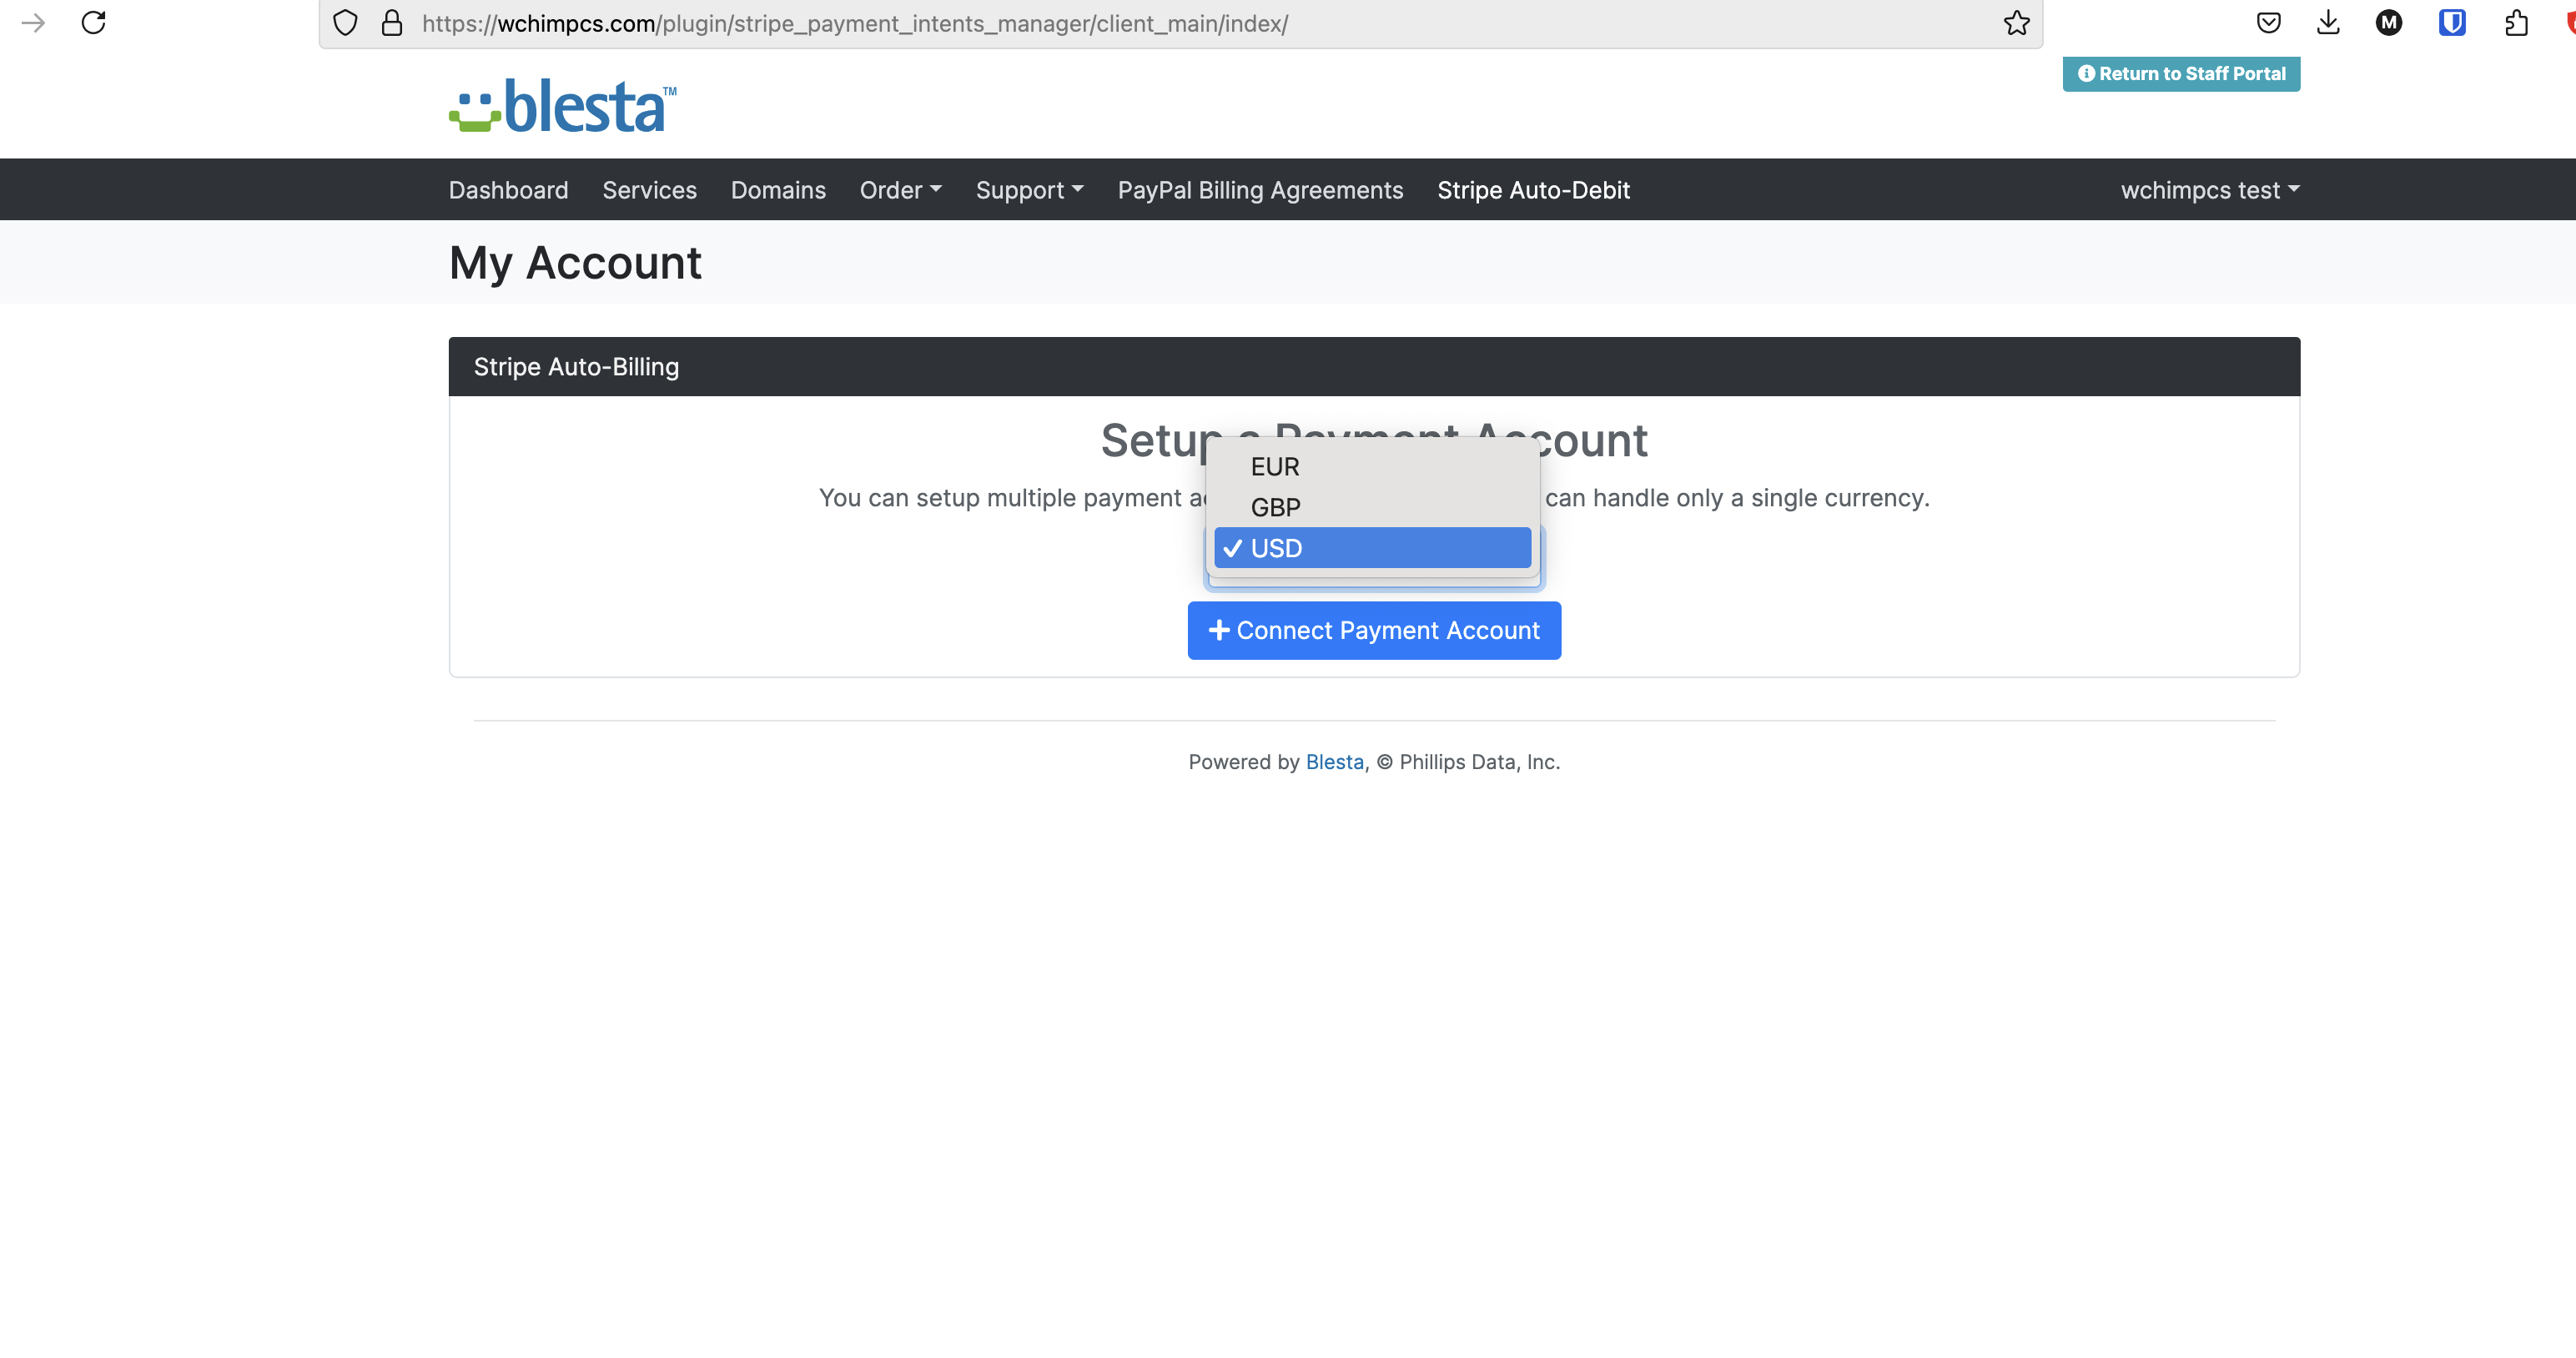
- Finally follow the
guide.mdto install Stripe Payment Intents Manager plugin! Then enable the gateway on order forms!
- Navigate to Settings > Payment Gateways in your Blesta admin panel (
-
Enable Payment Processing:
- Ensure that the Stripe Payment Intents Gateway is enabled for processing payments in your Blesta system by checking your order forms.
Testing the Gateway
Before going live, it is recommended to run a test transaction using Stripe’s test mode to ensure everything is working as expected. This allows you to verify that the integration is correct without making real charges.
-
Enable Test Mode:
- In Stripe, switch to test mode and generate test API keys.
- Use these test keys in the Blesta gateway settings and perform a test transaction to verify functionality.
-
Switch to Live Mode:
- Once testing is complete, replace the test API keys with live API keys in Blesta to start processing real payments.
Troubleshooting Common Issues
Transaction Failures
- Verify API Keys: Ensure the API keys entered in the Blesta gateway settings are correct.
- Check Stripe Mode: Ensure that your Stripe account is not in test mode when trying to process live transactions.
Cannot declare class error
- Delete the
vendordirectory from the Stripe Gateway and Stripe Payments Blesta Gateways! These can be found atcomponents/gateways/merchant/stripe_gatewayandcomponents/gateways/merchant/stripe_payments. - If you downloaded Stripe Universal a while ago or have and older version, delete (if present) the
vendordirectory from it. It can be found installed atcomponents/gateways/nonmerchant/stripe_universal.
Currency Mismatch
- Currency Configuration: Make sure the currency set in Blesta matches the currency settings in your Stripe account to avoid processing errors.
Quick Support
If you need help with setting up or managing the gateway, here’s how to obtain your Stripe API keys:
-
Login to Stripe:
- Visit the Stripe Dashboard and log in with your credentials and pick your payment methods from https://dashboard.stripe.com/settings/payment_methods/
-
API Keys:
- Navigate to Developers > API Keys.
- Copy the "Publishable Key" and "Secret/Restricted Key" from the dashboard.
-
Configure in Blesta:
- Paste these keys into the corresponding fields in your Blesta gateway settings and save your changes.
If you notice that some payment methods are missing:
-
Login to Stripe:
- Visit the Stripe Dashboard and log in with your credentials and pick your payment methods from https://dashboard.stripe.com/settings/payment_methods/
-
Click on your payment method:
- Check the following:
- Does the method support "Recurring payments"? If not, it is not supported by Stripe Payment Intents. Use Stripe Universal instead.
- Are you using the "Supported currencies" of the payment method? If not, change the currency used.
- Check the following:
Contact Us
If you encounter any issues or have suggestions for improving the gateway, please don't hesitate to contact us. We are committed to providing robust updates and appreciate customer feedback.
Pricing Options
Get exactly what you need and want.
Bundled
- +42 Other Extensions
- Additional Discounts
- Included Support & Updates
Leased
- Partially Encoded
- Full Functionality
- Included Support & Updates
Owned
- Partially Encoded
- Buy Once Use Forever
- 1 Year Support & Updates
Owned - Source
- Source Available
- Buy Once Use Forever
- 1 Year Support & Updates
The purchase of this extension also gives you access to the following extension(s):
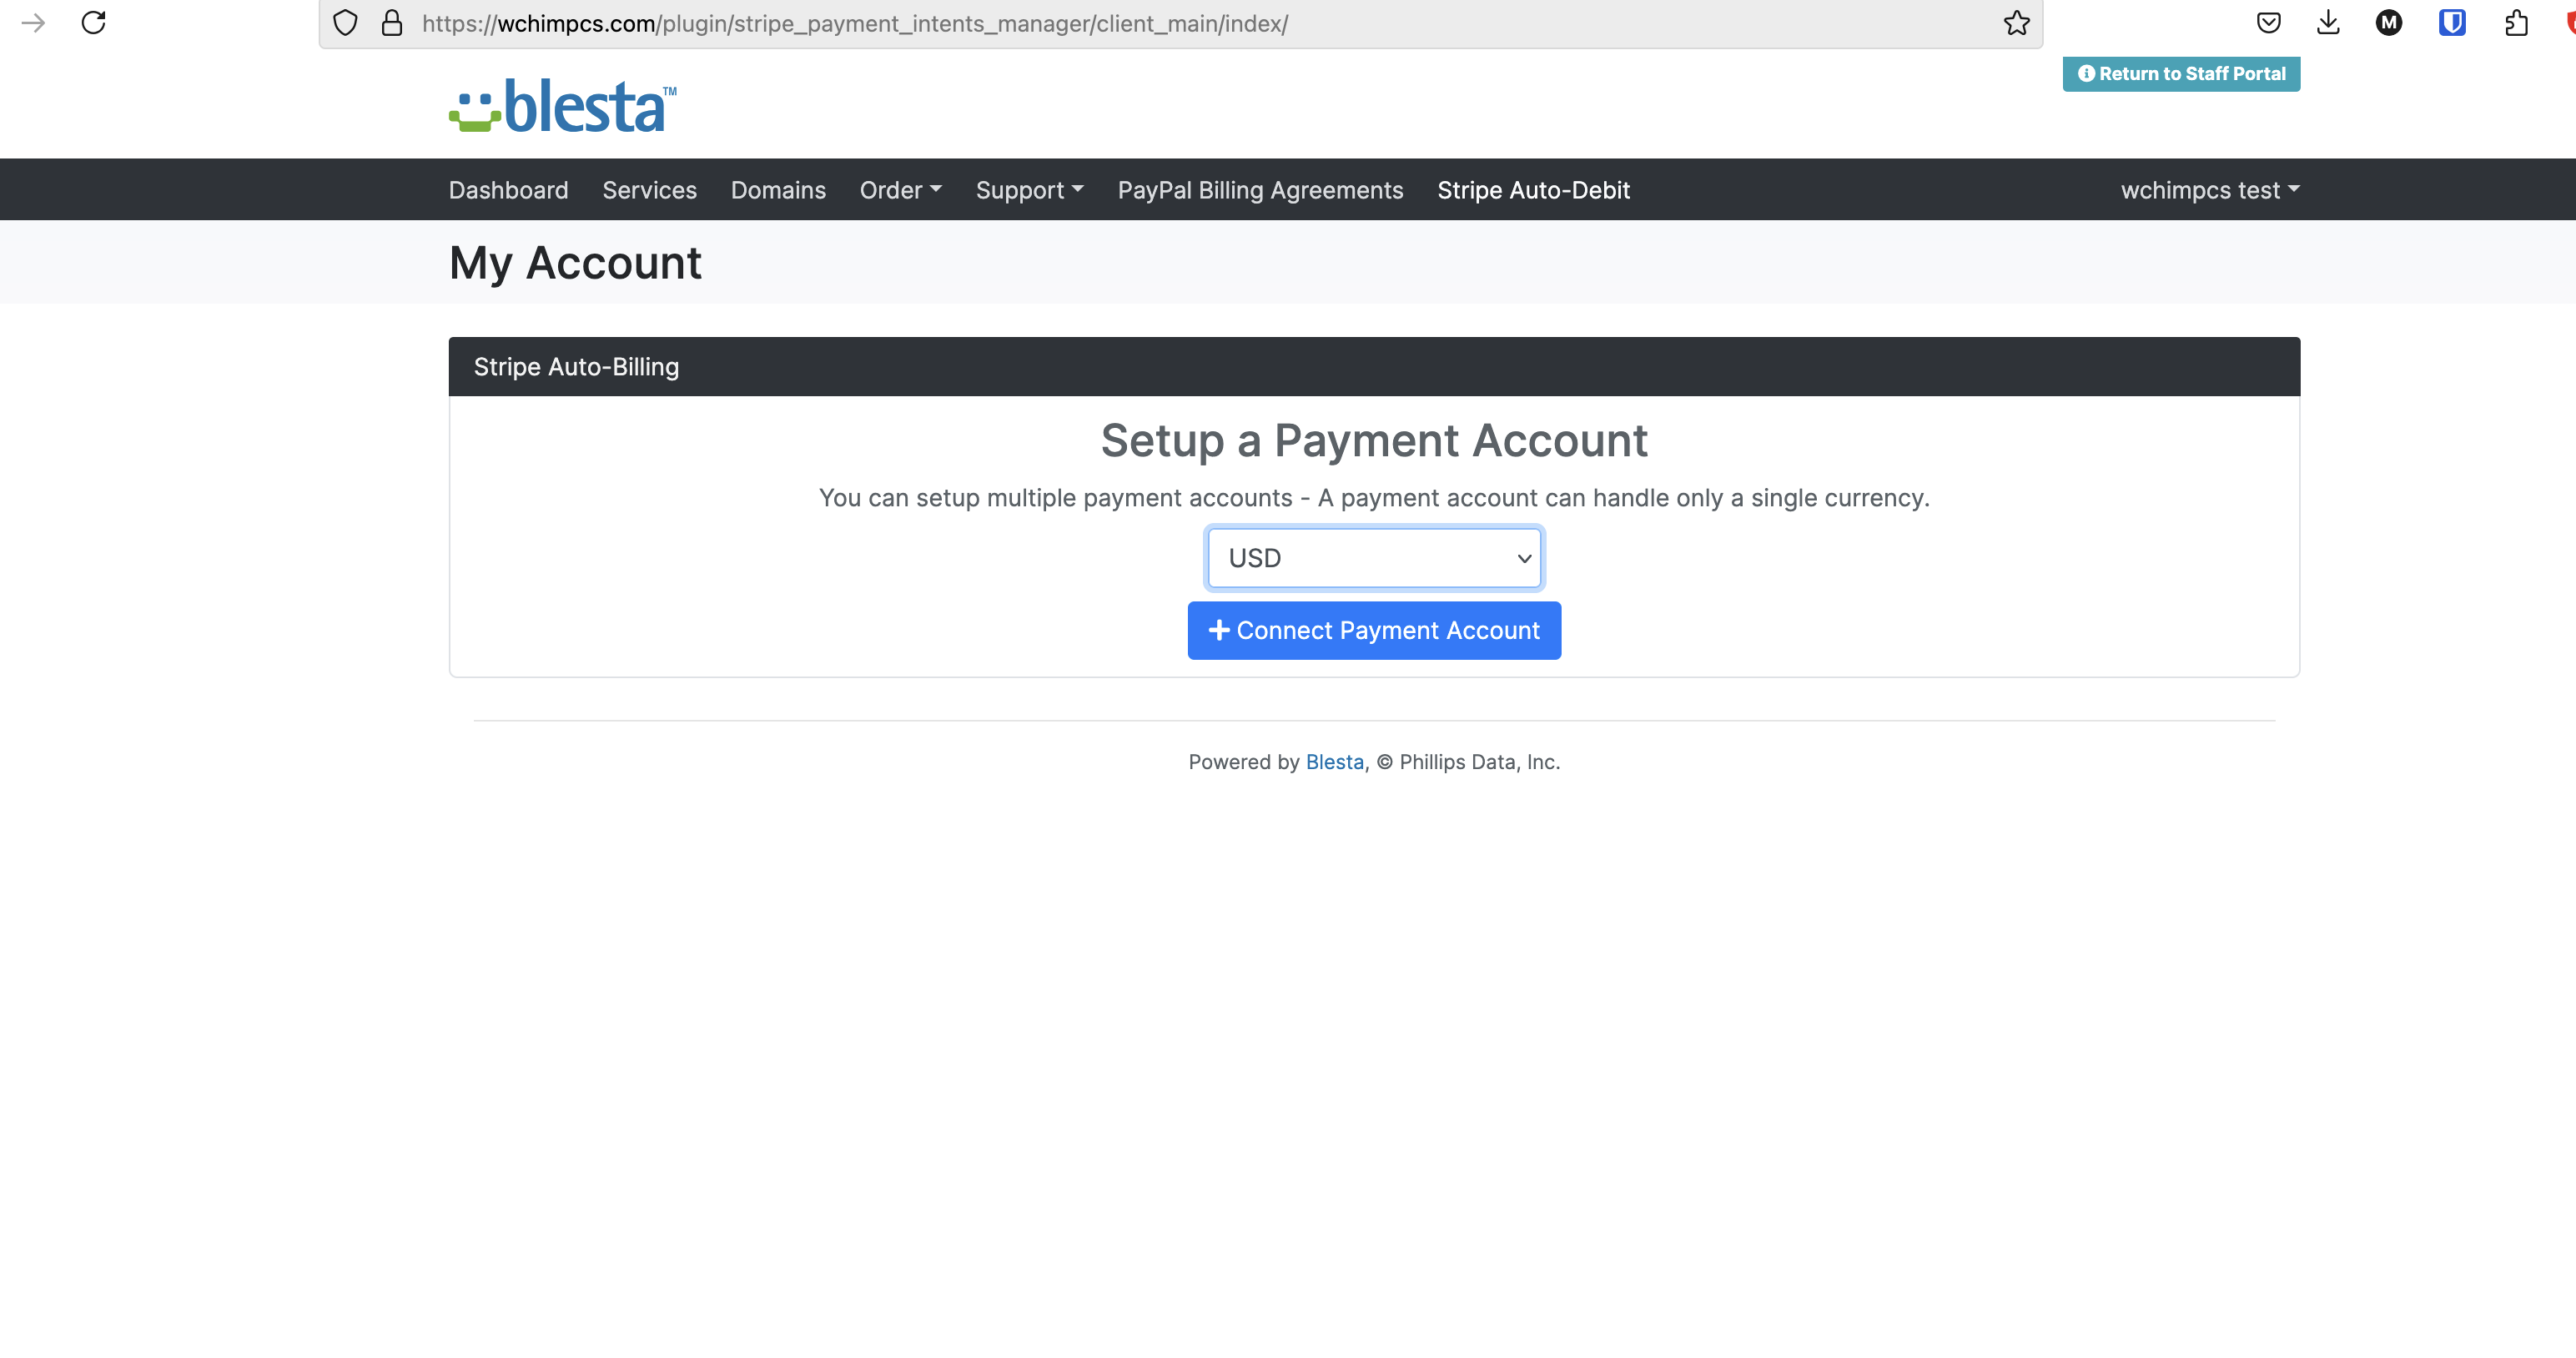
- Stripe Payment Intents Manager
These extension(s) are required for the full functionality of Stripe Payment Intents
Reviews
What our customers say
(0 customer reviews)
Seems like this extension doesn't have reviews yet...
Be one of the firsts to leave a review!
It is possible to leave a review only if you have purchased this extension or a bundle which contains it.
We reserve the right to alter wording or formatting for presentation.
We will discuss any changes made and offer the option to withdraw review text if the changes can't be agreed on.
It may take up to 1 hour for a review to appear or update due to caching.